THE FORGOTTEN STORY BEHIND JAPANESE CHISELS
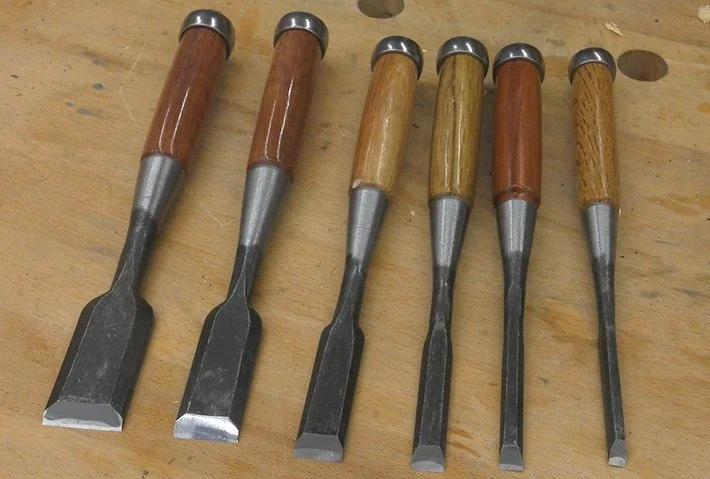
While Japanese chisels as woodworking implements have existed for centuries, it was perhaps makers of the famed samurai swords that have given us the chisels as we know them today. In this post, I'll share that forgotten story and help decode the fascinating technology that makes Japanese woodworking chisels so different from modern Western-style chisels. By the end, you'll have a whole new respect for this strange little tool with the dented backside.
A History of Craftsmanship: The Samurai and Their Swords
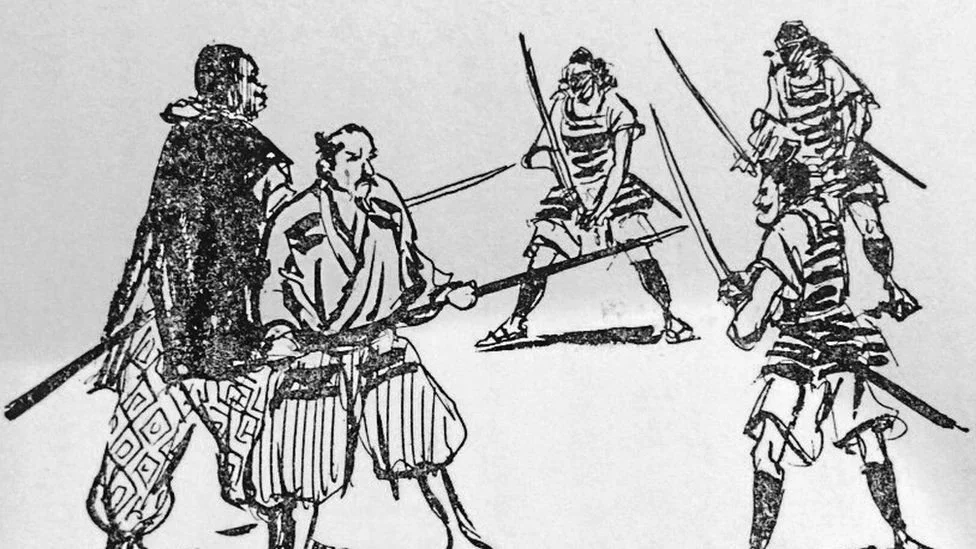
Let's begin way back in the days of the ancient samurai, a highly respected class of warriors that are perhaps most recognizable to Western cultures by their legendary swords. The makers of those swords were as respected as the samurai themselves. They dedicated their lives to their craft, often employing secret forging methods developed and passed down over generations. Apart from the nobility and the samurai themselves, only the makers had sufficient status to legally carry these swords.
The makers of those swords were as respected as the samurai themselves.
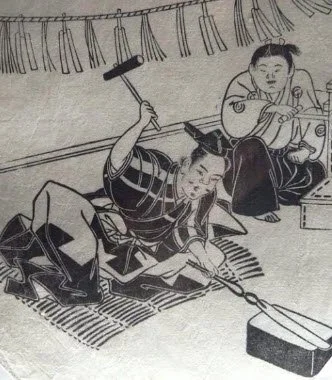
But that era came to an end when the samurai class was abolished in the latter half of the 19th century. Facing unemployment, many of the great sword makers adapted their technology to the crafting of other tools, including chisels. This heritage is one of the main reasons why Japanese woodworking tools quickly gained a reputation as some of the best in the world.
The Goal of the Japanese Tool Maker: To Create Nothing
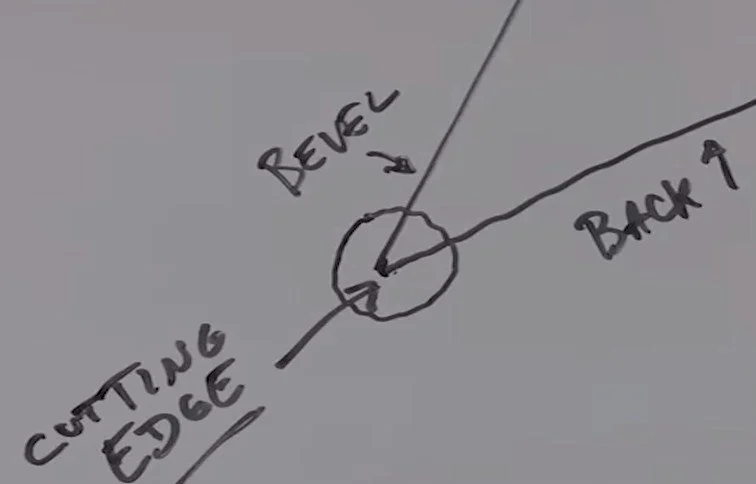
The goal of the Japanese tool maker was to create nothing. You see, a cutting edge is the point where two planes meet. In the case of a chisel, you have the sloped bevel which meets the flat back. To the naked eye, this may seem like a perfectly crisp edge. But if you were to zoom in with a microscope, you would see a blunt edge. It feels very sharp, but it's not perfect.
In the case of a typical chisel, where the sloped bevel meets the flat back, you will not have a perfectly crisp edge.
Perfection would require those two planes to continue past the blunt edge, theoretically thinning the steel until that edge becomes "nothing."
Getting as close to nothing as possible is what the Japanese masters spent centuries developing materials and techniques to achieve. If the steel were too soft, it would deform and roll over along that microscopically thin edge. You simply wouldn't be able to get a chisel as sharp as you could with harder steel. But if the steel were too hard, it would be brittle, and that ultra-sharp but also ultra-thin cutting edge would crumble away.
Finding the right alloys, forged using the right processes, at the right temperatures, with the right tolerances, is very precise work. While many of the Japanese chisels we find in woodworking supply catalogs today are mass-produced rather than handmade by an old master, much of the old technology still exists, including some of the best steel out there.
Japanese Chisels
The Steel: White Paper Steel vs. Blue Paper Steel
Japanese tool steel is complex, but for the sake of our discussion on chisels, it can be broken down into two main types: White Paper Steel and Blue Paper Steel.
Blue steel is the hardest. It will take the sharpest edge and remain sharp the longest. In fact, there are variations of Blue Steel with different contents that are even harder, including a "super-blue" that might take your edge closer to nothing than any of the old masters ever dreamed. However, blue steel can be very expensive—up to several hundred dollars per chisel for certain varieties. And with that extra hardness come some real downsides: it can be very difficult to sharpen and is prone to chipping.
That may be fine if you work with a lot of softwood, as they do in Japan. But harder woods may require a slightly more forgiving steel. That's why many of the Japanese chisels you find in the U.S. are made from White Paper Steel. This steel is still quite hard compared to some Western chisels, and there are different varieties of white steel with different properties. But it is generally easier to sharpen than blue steel. While it may not take quite as keen an edge, that edge won't be as brittle and short-lived.
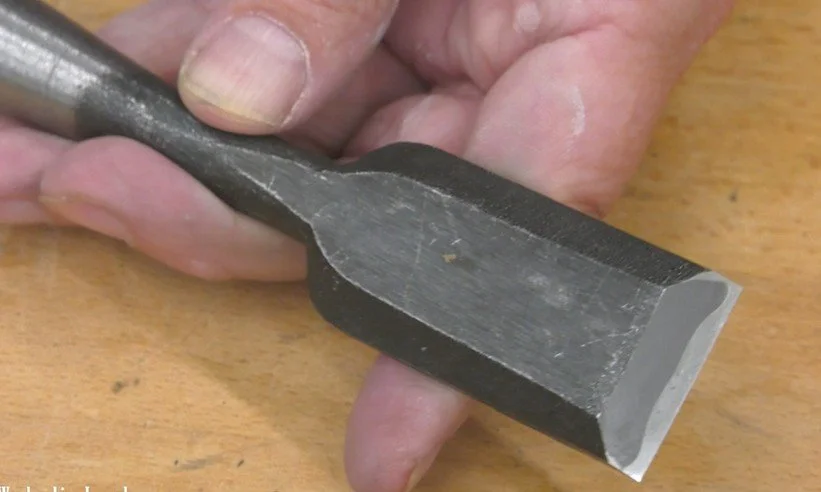
A White Paper Steel Chisel.
Blade Lamination: A Key Japanese Chisel Technology
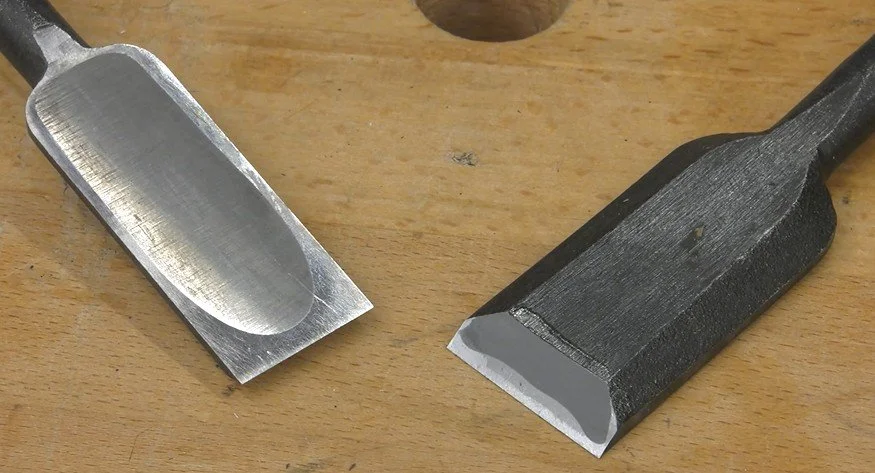
When I speak of blue and white steel, I’m not talking about the entire blade. Japanese chisels incorporate another useful bit of technology: blade lamination. If you look at the bevel, you'll see two different colors. The bulk of the tool is made from a softer steel, while a piece of harder steel is fused to the underside during the forging process.
Japanese chisels incorporate blade lamination technology.
Obviously, this lamination technique saves cost. But that's not its main purpose. Some Japanese steel is so hard it may crack or shatter when you strike the chisel with a hammer. The softer body absorbs the shock while the harder underside provides the superior cutting edge.
The dual layers also make the chisel easier to sharpen since two-thirds or more of the bevel is soft steel that is much easier to abrade with a stone than the hard steel.
The Hollow Back: A Japanese Chisel's Secret
Perhaps the most striking feature of a Japanese chisel is the back. Notice how it is hollow or dished out. This is another bit of old technology with a specific purpose.
The back of a japanese chisel is hollow, or dished out.
When you are paring or mortising, the back of the tool becomes your reference surface. It must sit flat on the wood. If there is a lump on the back of your chisel, the cutting edge will not shave wood properly.
With Western-style chisels, we typically flatten the backs as soon as we take them out of the package. That shiny flat surface doesn't have to extend down the entire back of the tool, but an inch or so from the cutting edge gives you the reference surface you need.
However, Japanese chisels—particularly the backs—are often made from very hard steel. It would take forever to flatten the entire thing. So long ago, Japanese tool makers began intentionally creating hollow or dished-out chisel backs. This makes it possible to produce a flat reference surface around the perimeter of the blade. If the area behind the cutting edge at the tip, the two edges, and the heel are all on the same plane, the chisel will function properly with much less work.
But don't confuse this with a Western-style chisel like the one I showed in a previous video about flattening chisel backs with sandpaper.
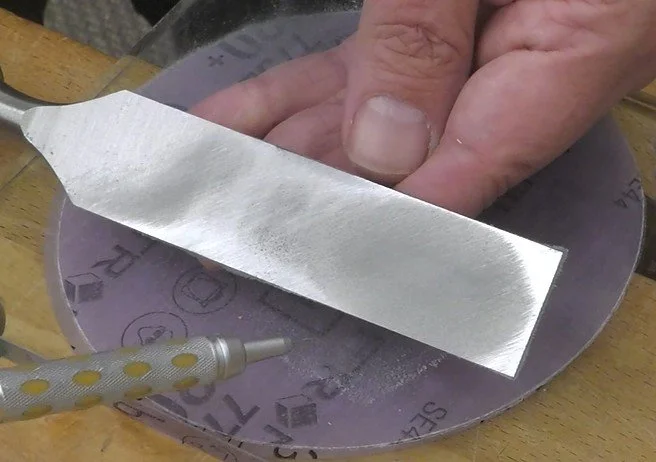
The back of this modern Western chisel.
The back of this chisel is dished out, as you can see by the dullness in the center after I rubbed it on a stone. But this wasn't an intentional feature created by the manufacturer, as it is on the Japanese version. This hollow is inconsistently formed.
Remember, I need reference surfaces at the tip, along the edges, and to a lesser extent, at the heel. As I rubbed the back on sandpaper to wear it down a bit, the hollow changed shape. It got smaller but still clings to one edge. That's because it was not consistently formed like the hollow on a Japanese chisel. I ended up having to remove almost all of the hollow to establish my reference surfaces, and in the end, I decided to just polish the whole back.
But that's not required with a Japanese chisel, which has an intentionally created, carefully centered, and evenly sloping hollow on its back. With this, I need only touch it up from time to time to be sure the perimeter around the hollow is flat and polished.
Some people wonder what happens when the tool gets shorter through repeated sharpenings of the bevel. Won’t the hollow area soon meet the cutting edge? It might, but the precise, consistent way that the hollow slopes away from the cutting edge causes it to shrink away as the back is worn down. So, if you find the cutting edge getting too close to the hollow area, just rub the back on a stone and the hollow will retreat again.
It’s worth noting that the traditional way to do this is not on a stone but by periodically reshaping the steel itself with careful and precise hammer taps. That is a highly skilled technique that only the most dedicated users still practice.
Unique Handles and the Genno Hammer
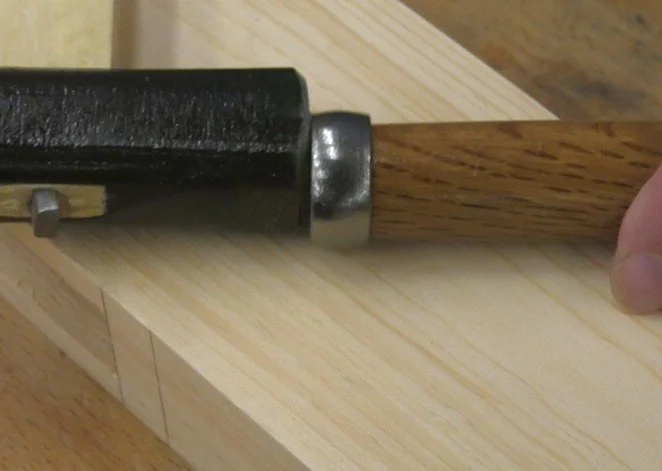
The handles of Japanese chisels are also unique. They are typically made from Japanese red or white oak and almost always feature a metal band at the end. When the chisel is new, this band is left intentionally loose.
The band at the end of a new Japanese chisel is left intentionally loose.
Traditionally, Japanese chisels are struck with a metal hammer called a genno. If you were to strike the wood alone, it would mushroom and splinter, eventually ruining the handle. The steel band restricts any mushrooming effect to the very end, so you have a pad to strike just ahead of the band. How much of a pad there is depends on personal preference, which is why the steel rings are left loose so you can set them yourself.
The steel band restricts any mushrooming effect to the very end, so you have a pad to strike just ahead of the band.
I prefer about 1/8 inch of wood protruding past the ring, so the ring has to be forced further down the handle. There are two ways to do this. I can compress the fibers by lightly tapping all the way around the end of the handle with the hammer, reducing its diameter so the ring can slide on further. Or I can use a tool called a ring setter. This is a steel cup that slips over the end of the chisel and forces the ring down the handle incrementally through hammer blows. If you buy a new set of Japanese chisels, get a ring setter. It will save you a lot of time and effort.
Once I have the protrusion I want, I soak the end of the handle in water for a few minutes. I had to sand the lacquer off the end of mine so the water could get into the fibers and soften them.
Then, I use the hammer to shape the end, mushrooming it over the edge of the ring a little at a time, working my way around. Now I have a nice little pad to strike with my genno without damaging the ring.
Conclusion: Should You Get Japanese Chisels?
Using Japanese chisels can be as simple or as complicated as you want it to be. If you're used to Western-style chisels, you can use a Japanese chisel in the same way. I sharpen mine frequently with 1000-grit diamonds, followed by a fair amount of stropping on both the front and the back. If it can shave hair easily, it can shave wood like butter too.
Should you get some Japanese chisels for your shop? Not necessarily. If you have and like your Western chisels, there's little you can do with these that you can't do with those. But most people who try Japanese chisels seem to like them very much, so take that for what it’s worth. I use my Western chisels most of the time, but occasionally I pull out my Japanese set and pretend I'm a woodworking samurai.
Need some cool tools for your shop? Browse my Amazon Shop for inspiration.
(This link is an affiliate link. If you make a purchase, I may receive a small commission.)

