
INDESTRUCTIBLE: I have NEVER seen a box made like this before
Impossible Dovetail Joints
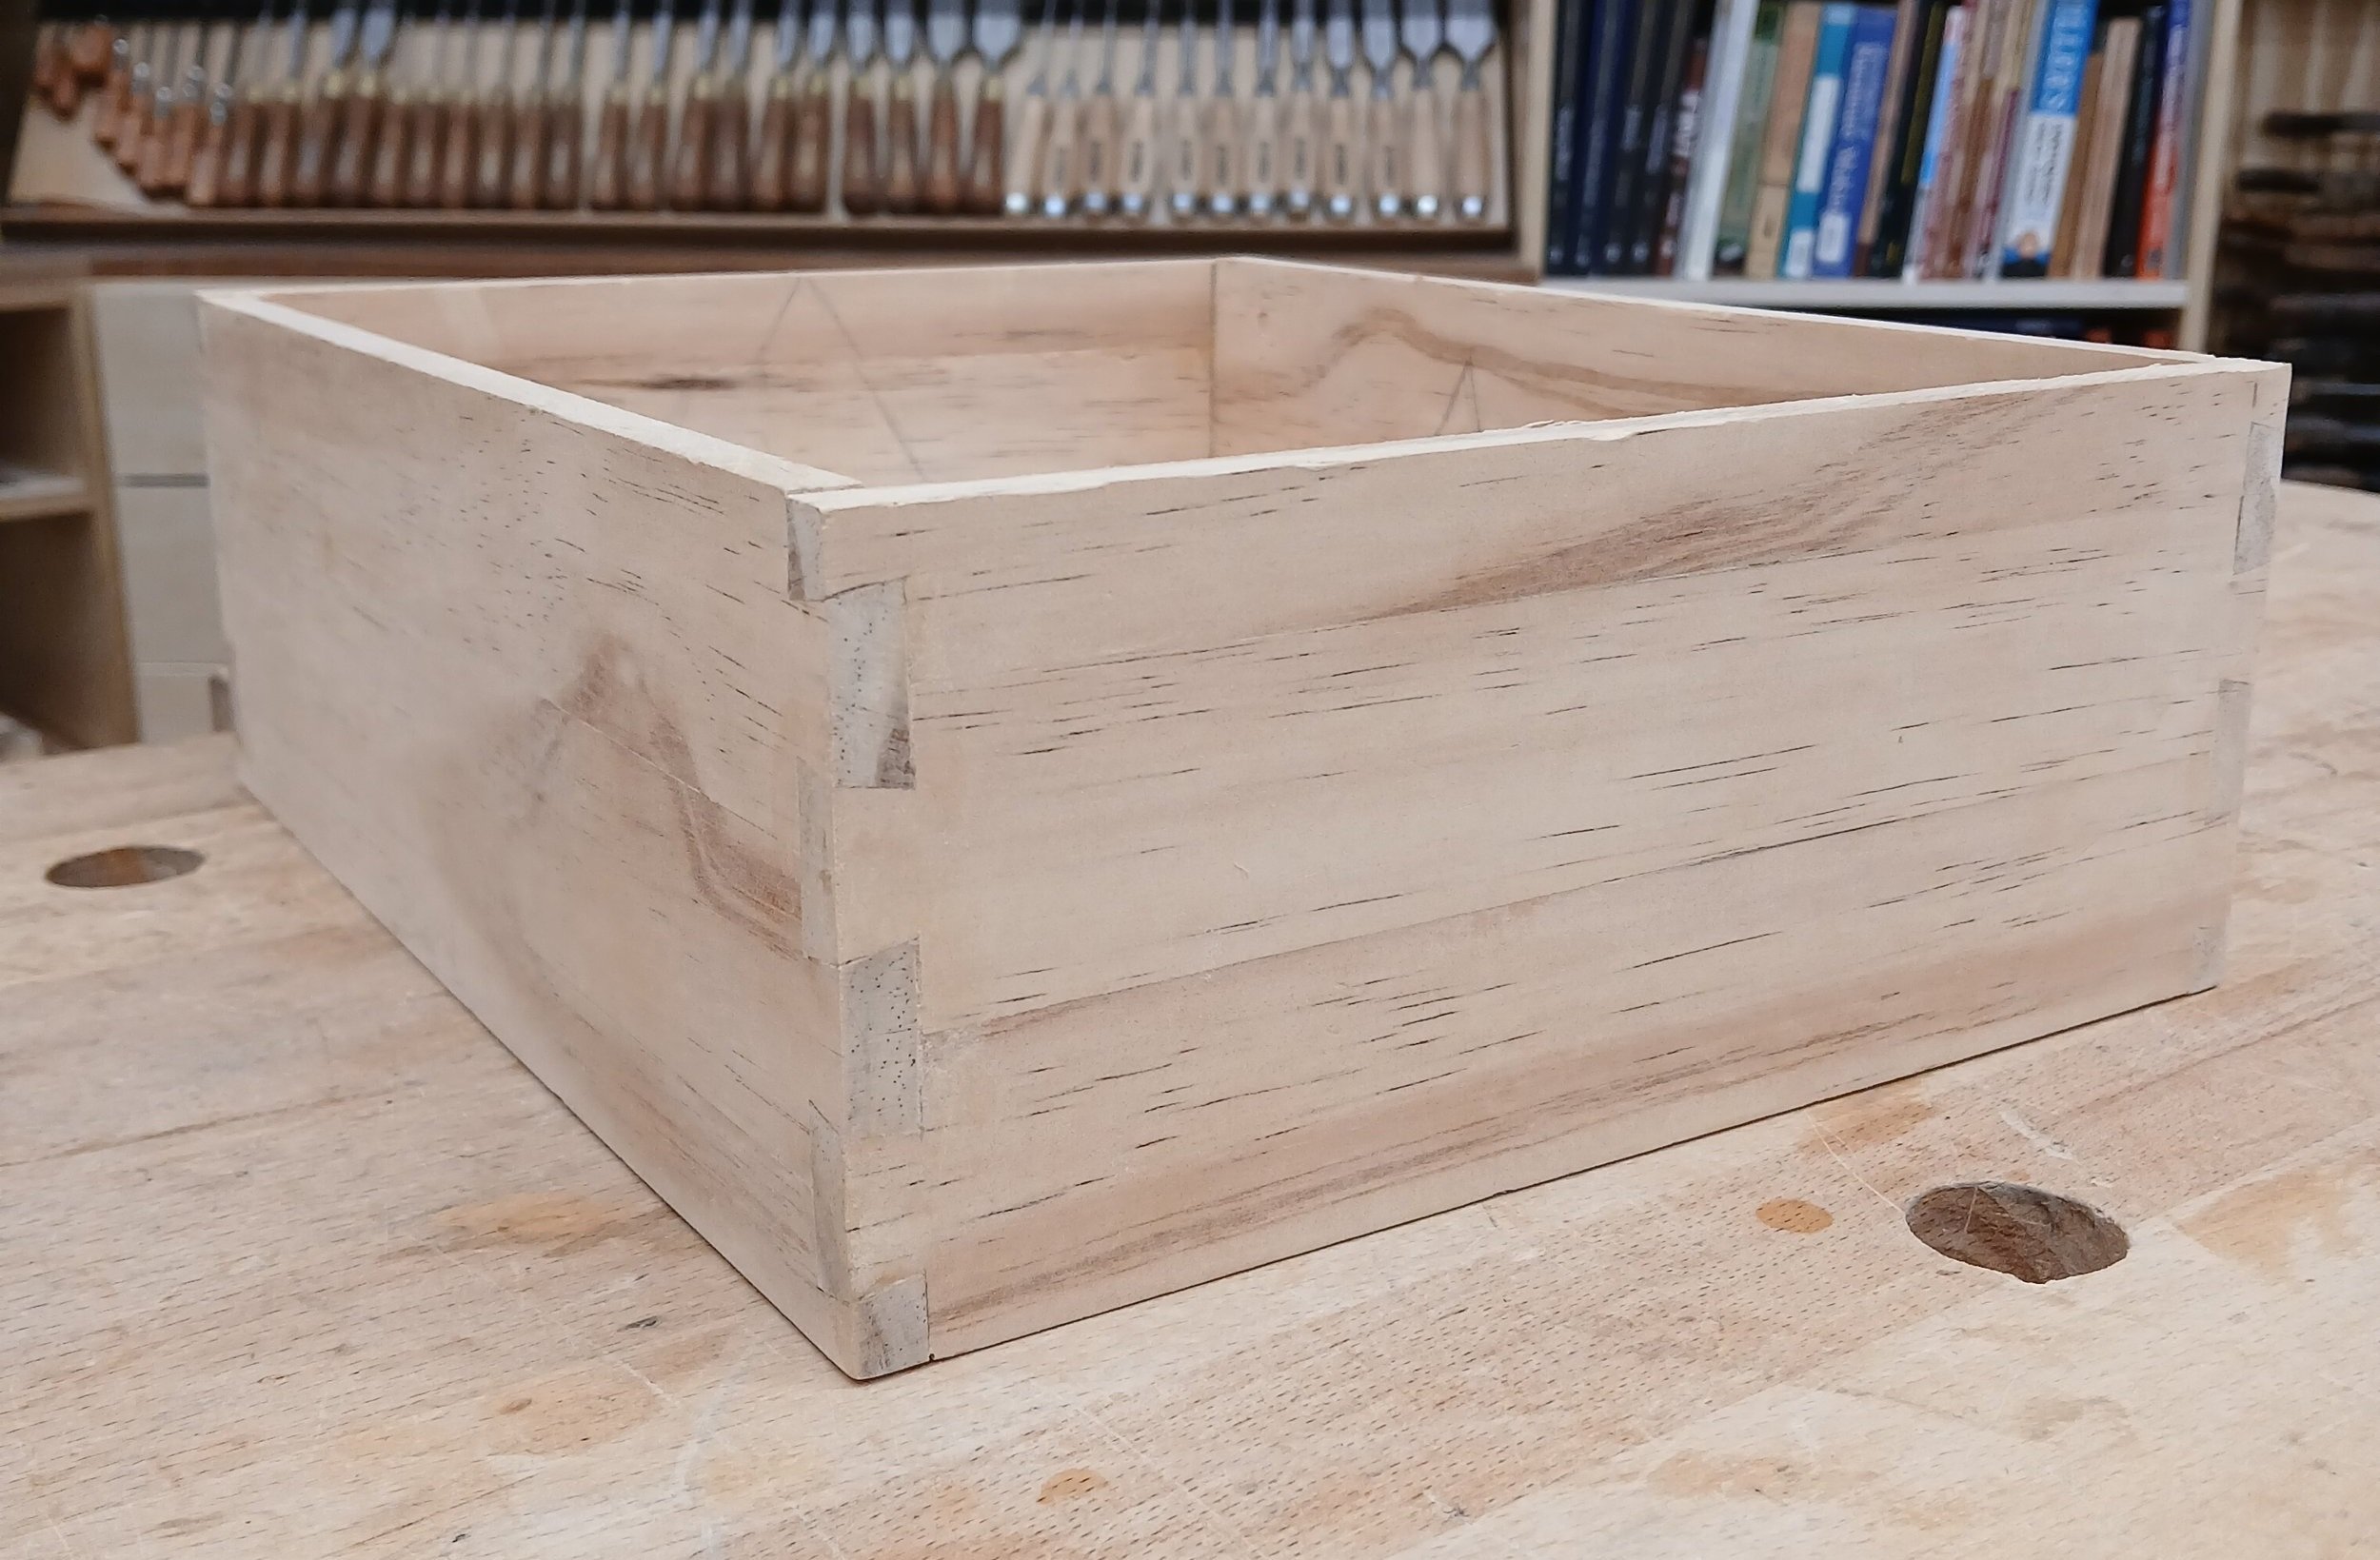
I built this box seven years ago, and I keep it in my shop because I believe it may be the only one like it in the world. I don't think anyone has built one quite like it—certainly not in the way I did, because I had to develop new methods to make it even possible.
What makes it so unique is the joinery at the corners. It may not look like much, but these joints can neither be assembled nor disassembled without breaking up the side panels, and therefore destroying the box itself. I call these corners "impossible dovetail joints," because they contain a secret that is mind-bending for those who first see the box, and fascinating for those who take the time to understand it. Let me explain...
Understanding Dovetail Joints
What is a dovetail joint? On one side, you have a series of tabs shaped like a dove's tail, which is where the joint gets its name. Those sloping sides fit into a set of angled pins on the other half of the joint. This will only go together in one direction, and it can only come apart in that same direction. You can't pull it apart the other way because the mating slopes prevent it.

A typical dovetail joint
This is where the impossible dovetail joint differs. The tabs are sloped on both sides. I'd love to take it apart and show you how it works, but it simply cannot come apart. It may be the strongest box ever made as far as the joinery is concerned. But what makes it resist disassembly also makes it impossible to assemble in the first place—at least not in the conventional way.

The Historical Secret Behind the Design
The secret goes back centuries to when you might have found this type of joinery, not in cabinet shops, but in the forests of rural America. It was used to build log cabins and other structures, primarily by German immigrants. Some of these buildings still survive hundreds of years later because the joints are not only very strong, but also rot-resistant since every surface within the joint slopes downward, keeping the water out.
Years ago, I saw one of these buildings and always wanted to make a box using the same unique joinery. But I found that building a box is not the same as assembling logs into a cabin. I had to develop entirely new methods to make this possible, and I think you will enjoy reading the process or watching the video at the top of this article.
Developing the "Impossible Dovetail Joint"
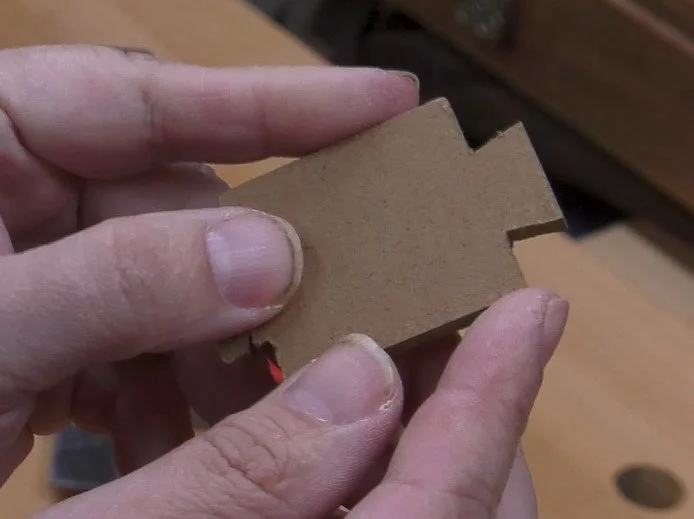
The pattern I used to lay out my tails
For the joint to work, each dovetail must be cut at a compound angle. The angles of the face of each tail must match the angles of the ends of each tail. And all those angles MUST be consistent throughout the joint. So I made a pattern to lay out my tails. The width of the pattern is equal to the width of the strips that will make up each side of the box. That's right, this box cannot be assembled without breaking the sides up into strips so they can be assembled like logs on a cabin wall. But unlike rough-hewn log walls where the gaps can be packed with mud and hog’s hair, all of my strips have to fit together seamlessly so they will reform into solid panels again. That means the width of my strips must be carefully calculated in their thickness, their width, their length, and the angles of the dovetails.
I did the math and created some drawings that you can copy if you like. You can use these dimensions to create patterns for four different material thicknesses, depending on what you want to use. But this is only a guide. You may have to tweak your pattern a bit, especially if your stock is not precisely 1/4, 3/8, 1/2, or 3/4-inch thick.
Laying Out the Dovetails
After my pattern was dialed in, I cut my four box sides into strips of the appropriate width, marking them with triangles so I could keep them all in order, just as they originally were on the solid boards because I wanted the grain to line back up when they are reassembled later.
Next, I used the pattern to lay out my dovetails on what will be the outer faces of each strip. Then I used one of the strips to mark the shoulder line on both sides. I repeated the process on each end of each strip—drawing the dovetail shape on what will be the outer face in the assembled box, and a shoulder line on both faces.
Cutting the Compound Angles
Now you may be wondering how I cut a compound angle using a 2-dimensional pattern. The answer is: with a simple jig. This ramp was built at the same angle that I used for the sides of my dovetails. In fact, I made the ramp first, then I used a bevel gauge to transfer that angle to the pattern so I could make it match the ramp precisely.
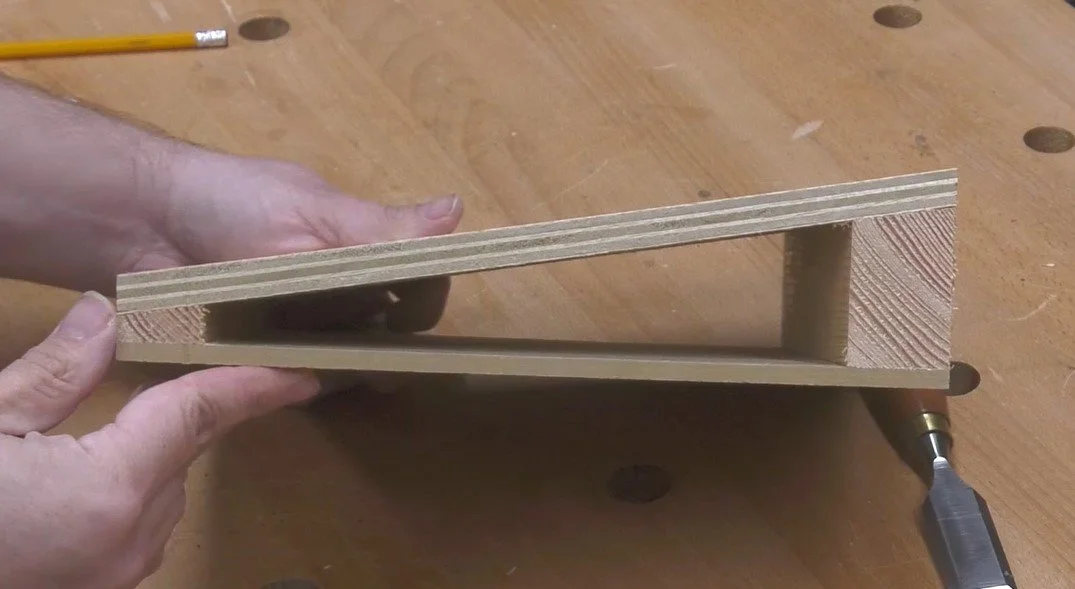
Compound Angle Cutting Jig
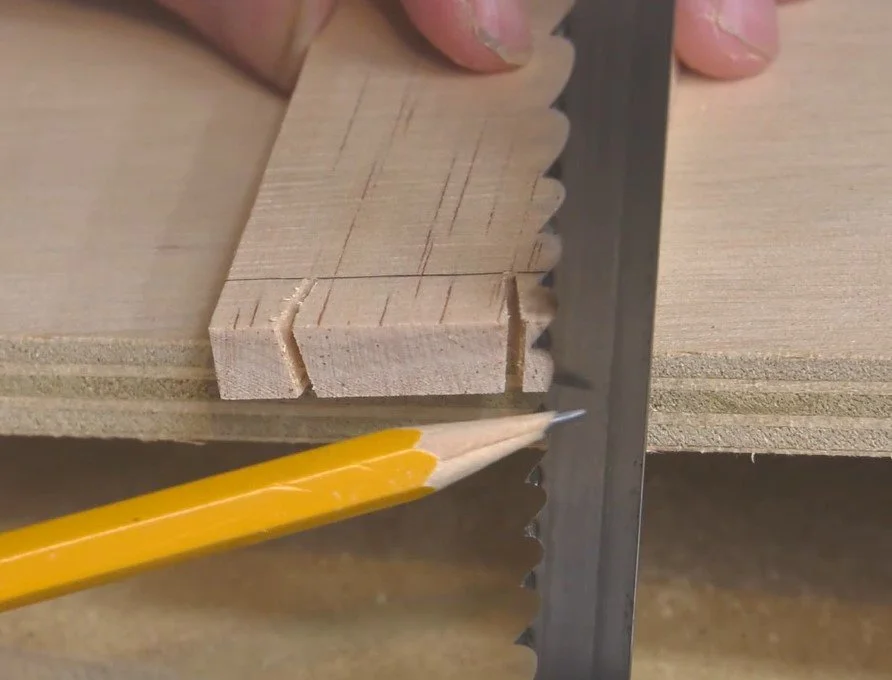
The ramp works with a bandsaw. It helps if you have a fence to keep square to the table as you cut. I started with the ramp sloping downward from left to right as I was facing the saw. Then I cut a kerf on just the right side of each dovetail. I cut carefully, leaving my pencil line intact. I repeated the same cut on each end of each strip of wood.
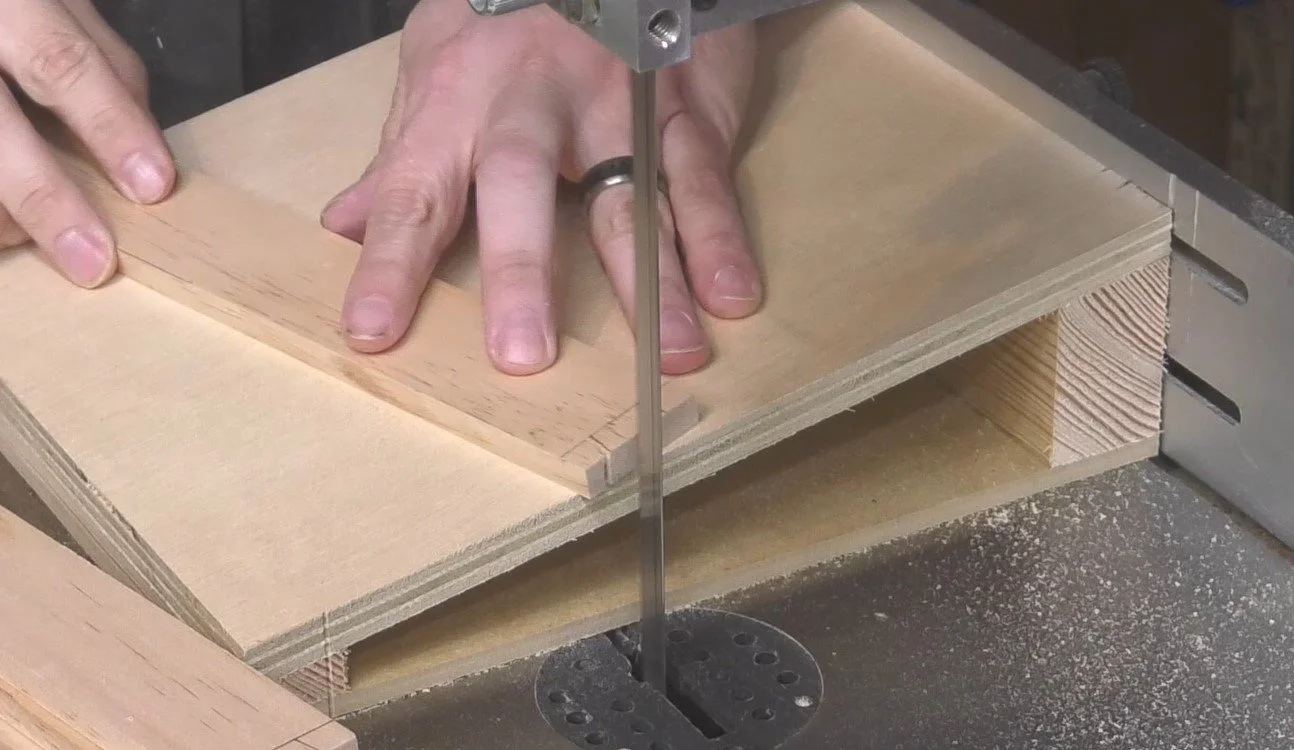
Cutting one side of the dovetail
Once that was finished, I rotated the ramp 180 degrees so it sloped from right to left and repeated the process, only this time I cut on the left side of my pencil lines.
Final Cuts and Assembly
Cutting the dovetail shoulders
After I did this on both ends of each strip, I rotated the ramp so it sloped downward toward me and slid it up beside the blade to cut along the shoulder lines. But before I began, I checked the end of the workpiece to be sure the angle of the dovetail was parallel to the saw blade. I didn’t want the blade to cut into the wide portion of the dovetail as I cut the shoulders. It helped to keep all the strips oriented in the same direction, keeping track of what would be the inner and outer faces when the box was assembled. If I hadn't marked those faces, I could still identify them by looking at the ends of the dovetails. The wider face of the dovetail is the inner surface of the strip. That’s the face I wanted facing upward as I cut the shoulder lines with the ramp sloping toward me.
As before, I was only cutting on one side of each dovetail, repeating the same cut on each end of each strip. Then I rotated the ramp so it sloped away from me and cut the shoulders on the other side of each dovetail. For that side, I also had to flip the strips over, placing the outer faces of the strips upward on the ramp.
Assembling the Box
Grooves cut for bottom panel
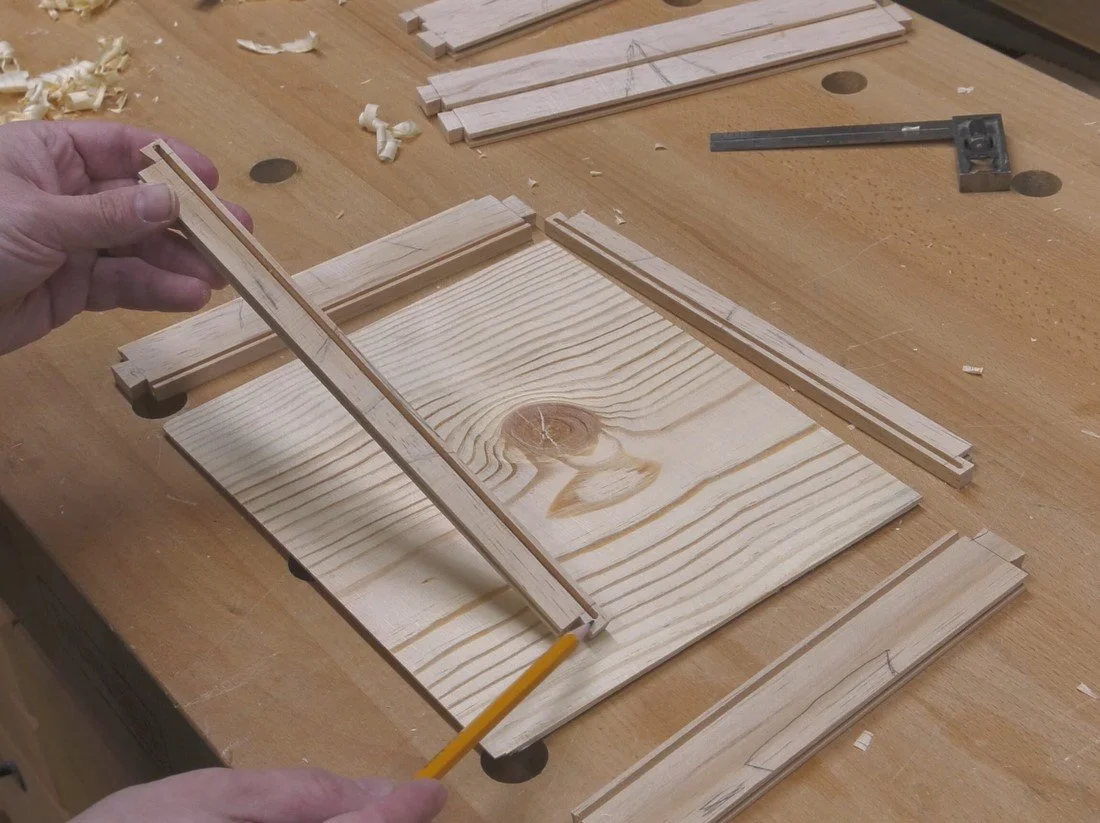
Back at the bench, I laid my strips out using the triangles I previously drew as a reference. I knew the box would be a lot easier to assemble if I cut some slots for splines in all the edge joints, so I used a pencil to mark where those slots should be. Then I cut them at the table saw as deeply as possible without the blade cutting into the ends of my dovetails. As I cut each slot, I made sure the outer face of each strip was against the fence. Then I ripped splines from the same material the box was made from.
Next, I selected the two long strips that would go on the bottom of the box sides, and the two short strips that would go on the top of the box ends, and I ripped them exactly in half. I also took all four strips that would be on the bottom of the box and routed a 1/4-inch groove into them for the bottom panel. Notice how on the two long strips (which were the ones I ripped in half) I stopped the groove just short of the ends, while on the two short end strips, I cut the groove all the way down the length.
I used a solid panel for the bottom but had to bevel the edges with a plane so they were thin enough to fit in my 1/4-inch grooves.
The Assembly Process
To begin assembling the pieces, I put glue only on the dovetails. I didn’t glue the bottom panel into its slot. Instead, I just slid it deeply into the slot on one end of the box so I could get the end strip in place, then I worked it back with my fingers so it was floating in all four slots, allowing it to move a bit as it swells and shrinks with changes in humidity.
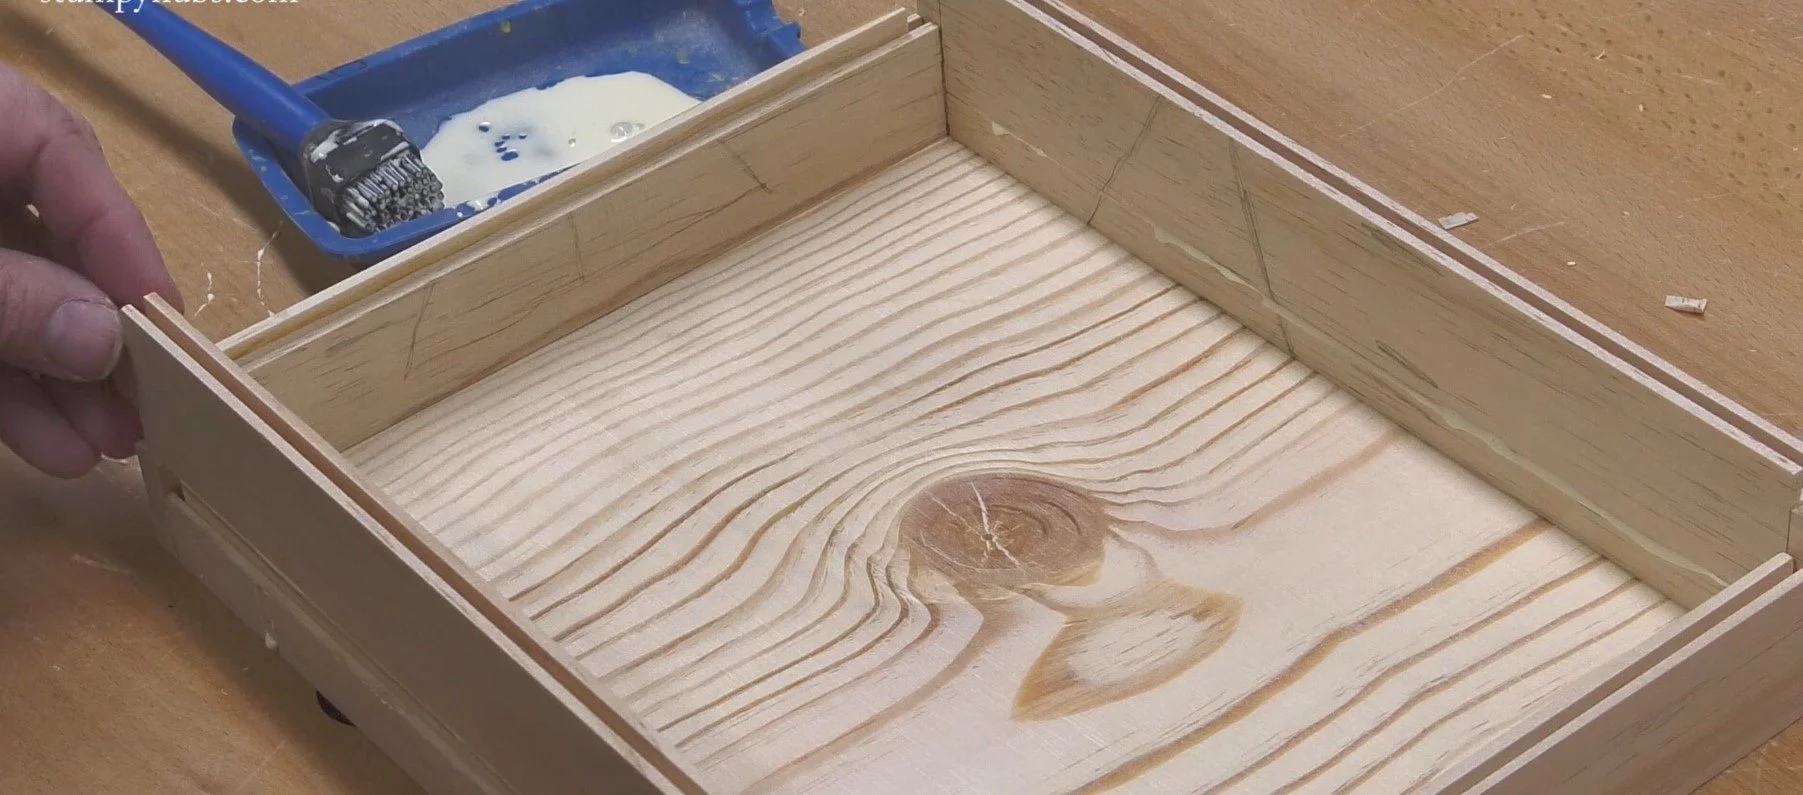
Assembling the box
The rest of the assembly was pretty easy. I just built it upward like a log cabin. The splines were glued into the edge joints, and the dovetails were glued on the ends as I moved up from one layer to the next.
Patience in the Build
I do admit that this was the second time I'd assembled it. I did it without glue first, then I looked for gaps and used a chisel to fine-tune the dovetails, shaving a tiny bit off their width to close up any gaps. This is just how log cabins were built. Each log may have been placed, removed, and replaced several times until the right fit was achieved. Building a box like this takes equal patience. Of course, clamps can be used to close up any small gaps as the glue dries, and if that doesn’t work, you can always add some glue and sawdust filler, and the gaps will all but disappear.
It was a very difficult build, but a really rewarding challenge. And in the seven years since I made it, it’s been a conversation piece about history, log cabins, and seemingly impossible joinery. Why not give it a try?
★SOME OF MY FAVORITE INEXPENSIVE TOOLS★
-ISOtunes Hearing Protection (Save 10%): https://bit.ly/3BHYdH7
-BOW Featherboards: https://amzn.to/430ldhv
-123 Blocks: https://lddy.no/vpij
-Mechanical Pencils: https://amzn.to/2PA7bwK
-Lumber pencil: https://amzn.to/2QtwZjv
-Pocket Measuring Tape: http://amzn.to/2kNTlI9
-Nut/Bolt/Screw Gauge: http://amzn.to/2CuvxSK
-Self-Centering Bits: https://amzn.to/2xs71UW
-Steel Ruler: https://lddy.no/10mv7
-Center-Finding Ruler: https://lddy.no/10nak
-Bit & Blade Cleaner: https://amzn.to/2TfvEOI
-Narex Chisels: https://lddy.no/sqm3
-Mini Pull Saw: https://amzn.to/2UEHBz6
-Shinwa Rulers: https://lddy.no/zl13
(If you use one of the affiliate links above, we may receive a small commission)