FRENCH CLEATS - ARE THEY WORTH THE HYPE?
These days french cleats have become pretty popular among various YouTubers and in the overall maker movement. But mostly in the context of cleat walls. This is a big thing online. Folks put rows of wood strips all over their walls and make all sorts of handy tool holders that may be hung and arranged wherever they like.
But the french cleat isn't just for modular wall organization systems. It is also a great way to hang cabinets and shelves and other large and heavy objects on the walls of your shop, home or office. In fact, I wouldn't build wall cabinets without french cleats.
Trust me—if you haven't used them yet, it's time to jump on the French cleat bandwagon.
So, What Exactly is a French Cleat?
Let's begin with what makes the French cleat system work. Imagine you built a cabinet that must be hung on the wall. It can be a challenge to hold a heavy cabinet in place while you level it and drive screws through the back and into the wall studs.
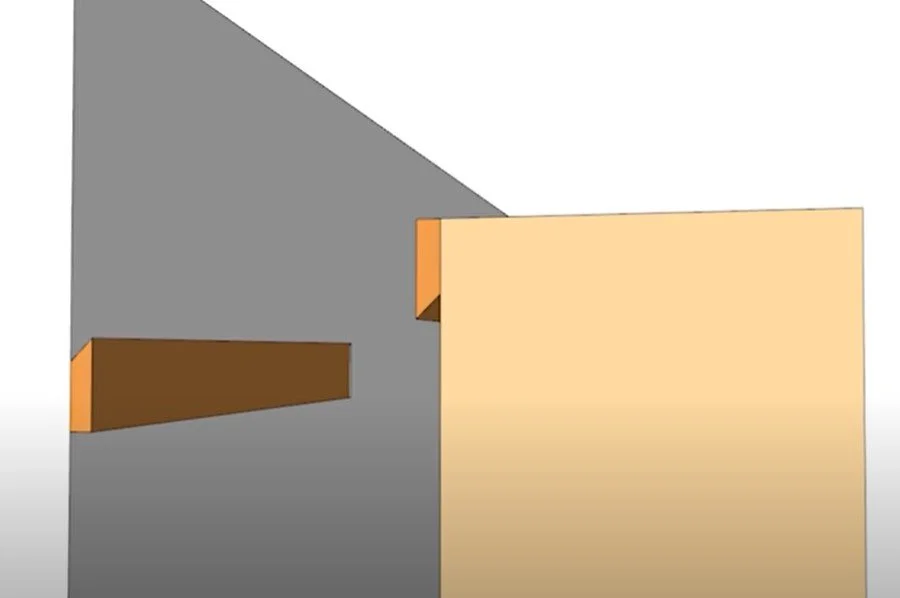
A French cleat changes everything. It consists of two strips of wood with beveled edges. One attaches to wall with the sharp edge pointing upward and sloping downwards toward the wall. The second strip attaches to the back of the cabinet with the sharp edge pointing downward and also sloping away from the cabinet.
Should You Start Using French Cleats?
Now, you might be wondering, “Why should I bother with French cleats?” Well, let me give you a couple good reasons:
They’re Strong and Secure
The weight of the cabinet, combined with the interlocking bevels, will hold it securely in place, though some folks like to drive in a couple screws just to keep it from shifting over time. This make hanging cabinets as easy as dropping one strip onto the other. Let me tell you, it is far easier to level and screw a simple strip of wood to the wall than a whole cabinet. On that note…
They Make Hanging Multiple Cabinets Easier
French cleats really pay off when you have several cabinets to hang, all of which may be attached to a single, long cleat. This allow you to shift them around until you get them exactly where you want them, before screwing them in place more permanently. It is as easy as dropping one strip onto the other.
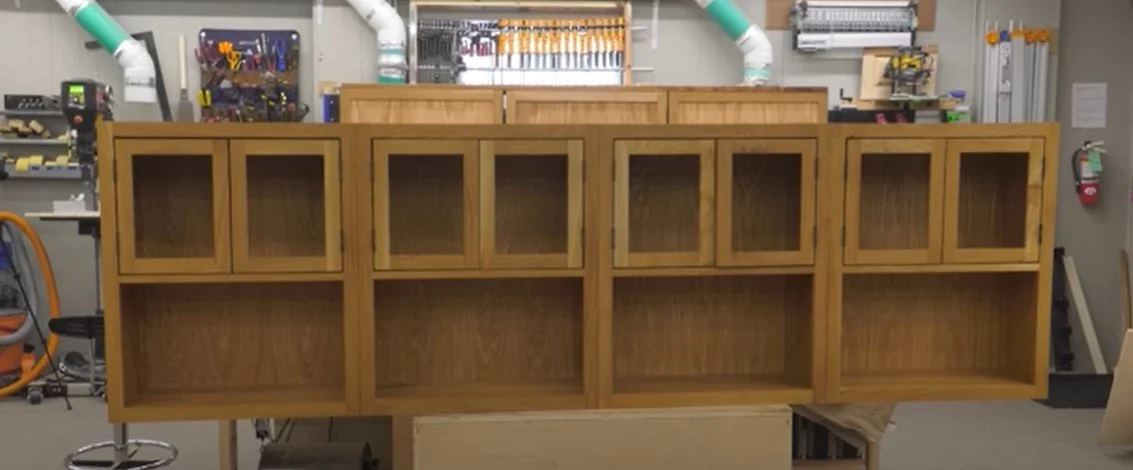
These office cabinets were all attached together into a single unit with the face frames all aligned ahead of time Then it was hung on a cleat as if it were a single cabinet. Imagine how much more difficult this would have been if they were all installed and aligned one at a time without the benefit of the French cleats?
Are There Downsides?
There are some other things you must consider, though.
Mind The Gap
For one thing, the cleat creates a gap between the cabinet and the wall. To keep the cabinet from tipping forward you must add a second, non-beveled strip near the bottom. This is usually attached to the back of the cabinet itself, but you could attach a filler strip directly to the wall if you prefer.
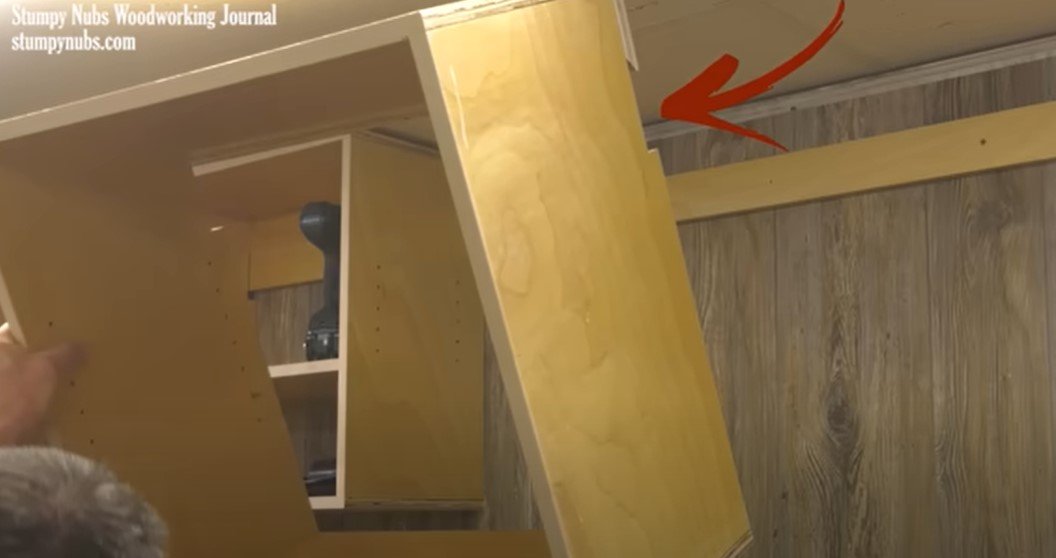
Another way to deal with this problem is to cut notches in the side panels when you build each cabinet so you can mount them fully in contact the wall. In this case it made it possible to use the wall itself as a cabinet's back. Note how the notch is wider than the wall cleat so there is room for the bevels to come together as the cabinet drops in place.
Getting the Profesh Look
The second issue concerns that same gap between the cabinet and the wall. It doesn't look great from the side. Even the cut out version isn't something you'd want to see in a nice kitchen, for example.
This is can solved by adding a cover panel to the end of the last cabinet in each row. But it may also be dealt with during the cabinet construction.
If you have only one cabinet to hang, the cleat may be mounted flush with the back edges of the side panel, and the mating wall cleat may fit in that same space, between the two side panels and invisible from the outside.
You might also make the bottom panel of each cabinet wider so it will also contact the wall and eliminate the need for a lower filler strip.
If you plan to hang multiple cabinets on a single cleat, you might just make the side panel of the last cabinet in the row 3/4-inch wider than the rest, and let it cover the end of the wall cleat.
How to Build Your Own French Cleat System
Now, let's talk about the cleats themselves. I recommend 3/4-inch plywood. You could make cleats from solid wood, such as dimensional pine from the home center, but the grain orientation can weaken the sharp edges and one may split under a heavy load. Plywood eliminates grain concerns.
The width is up to you, I like at least 3-inces so you have enough flat surface against the wall. Always screw them to studs, you never know how much weight they will have to hold.
You may rip and then bevel all the strips individually, but you can save some cuts by making two strips at once. Let's say I have a 6-inch board and I want to make two strips from it, one for the cabinet and the other for the wall. I can tilt my blade to about 45-degrees and rip right down the middle. But finding that middle isn't as simple as setting the fence to 3-inches. You must account for the angled cut.
Here's a trick for ripping a bevel down the center of any board. Take the width of the board, in this case 6-inches, and subtract half its width and half its thickness. Half the width is 3-inches, half the thickness is 3/8, and half the width of the blade so I set my fence to 2-5/8. That will get me close enough to center for most uses. After all, your cleats don't have to match perfectly. But if you ever do want two perfectly matching beveled pieces, subtract half the thickness of your saw blade, as well.
Conclusion
If you haven’t given French cleats a try yet, you’re missing out on a simple and sturdy solution to your cabinetry needs.
Give it a shot in your next home project, and you will see just how easy it really is. Plus, you'll wonder why you didn’t use this method sooner.
Thanks for reading, and until next time—happy woodworking!
Check out our shop.
★SOME OF MY FAVORITE INEXPENSIVE TOOLS★
-ISOtunes Hearing Protection (Save 10%): https://bit.ly/3BHYdH7
-BOW Featherboards: https://amzn.to/430ldhv
-123 Blocks: https://lddy.no/vpij
-Mechanical Pencils: https://amzn.to/2PA7bwK
-Lumber pencil: https://amzn.to/2QtwZjv
-Pocket Measuring Tape: http://amzn.to/2kNTlI9
-Nut/Bolt/Screw Gauge: http://amzn.to/2CuvxSK
-Self-Centering Bits: https://amzn.to/2xs71UW
-Steel Ruler: https://lddy.no/10mv7
-Center-Finding Ruler: https://lddy.no/10nak
-Bit & Blade Cleaner: https://amzn.to/2TfvEOI
-Narex Chisels: https://lddy.no/sqm3
-Mini Pull Saw: https://amzn.to/2UEHBz6
-Shinwa Rulers: https://lddy.no/zl13
(If you use one of these affiliate links, we may receive a small commission)


