
DO YOU NEED A WOOD MARKING GAUGE?
A marking gauge is a timeless woodworking tool that provides precision and repeatability that pencils and rulers alone cannot. This article explores different types of gauges—pin, knife, and disc-style—explaining their uses, proper technique, and applications for joinery, layout, and surface marking.
One of the true breakthrough moments many new — and even some veteran — woodworkers experience is the day they discover how useful a traditional marking gauge can be. Today is that day.
Up until now, you may have had no idea what a marking gauge was, or you may have dismissed it as an old-fashioned tool made obsolete by the pencil. Boy, were you wrong.
A marking gauge is an ancient tool, and it is designed around an ancient principle that remains fundamental in woodworking today: project parts should be fit together, not merely machined to match numbers on paper.
For example, a modern woodworker may wish to join one board to another with a rabbet joint. Since he’s working with standard 3/4-inch stock, he takes his ruler and places a mark 3/4-inch from the end — and that’s the width of the rabbet he cuts. Then he has to do a bunch of sanding because the joint didn’t come out flush.
What happened? His board may not have been precisely 3/4-inch thick — they rarely are. Or he may have misread his ruler and marked in the wrong place. His ruler may not have been precisely positioned on the end of the board. His eyes may have prevented him from aligning his pencil point precisely with the mark on the ruler, and the thickness of the pencil line may have added even more error.
But what if he had used a marking gauge, which can physically be set to the precise thickness of the board itself — whether it’s 3/4-inch or 25/32 or whatever. The marking gauge references directly off the end of the workpiece so you can’t screw that up. It doesn’t rely upon your eyesight or your ability to align the point of your pencil with the scale on your ruler. And the mark it produces is far more accurate than a pencil line — both in width, and because it can serve as a physical location for some cutting tools such as chisels.
This joint is just one example. There are many other uses for a marking gauge, and in this article we’ll discuss the differences between various types of gauges and ways that you may use them — even if you favor power tools for most of your work.
Understanding the Marking Gauge
Let’s begin by identifying the parts of a marking gauge so you know what I’m talking about as I use these terms throughout the video.
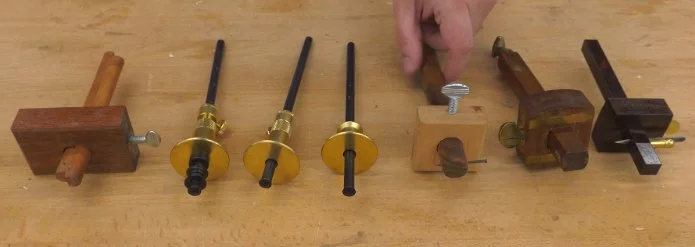
These are all different types of marking gauges. We’ll discuss their differences later, but they all have these things in common:
The long skinny part is called the beam.
The larger part that moves up and down the beam is called the fence.
The sharp bit that does the marking is called the cutter, and those can take various forms.
Pin-Style Gauges
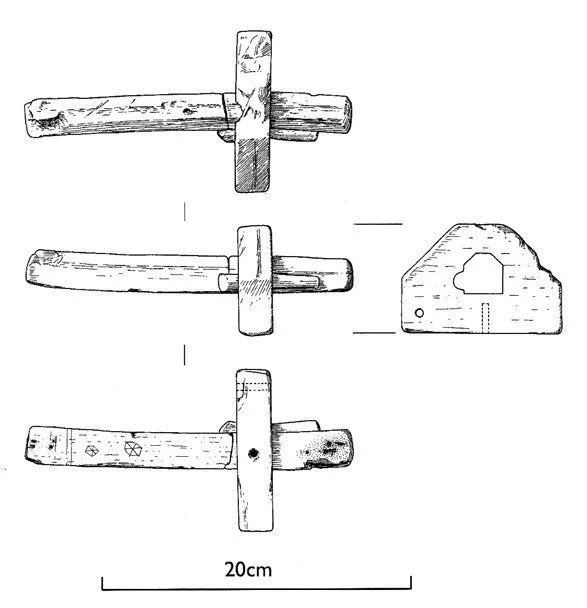
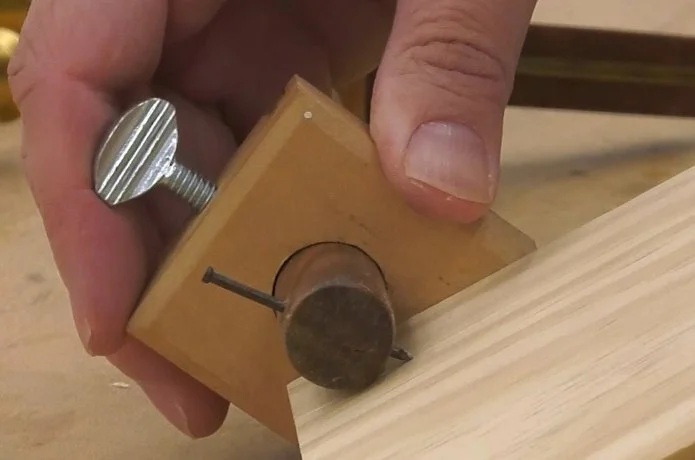
This is a homemade gauge I made myself. It has a pin-style cutter, meaning a little round point (in this case, a nail) which scratches the wood to produce a line. These pin-style cutters are very common — both in homemade versions like the above and in many antique examples, such as the one below from the late 1800s.
The downside of a pin-style gauge is that while it seems to do a good job when marking with the grain, it can tear the fibers when marking across the grain. This can be a problem if you want to cut crisp joinery right up to that line.
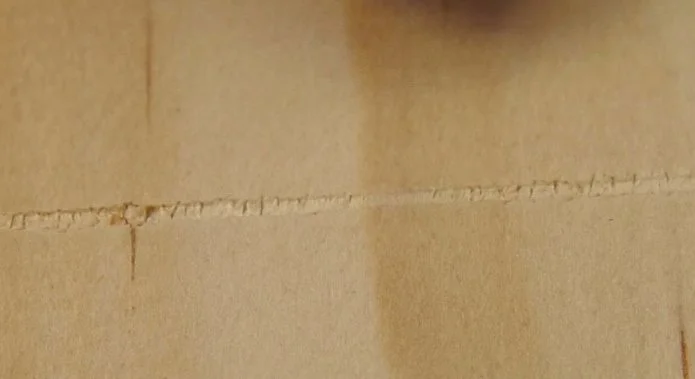
A pin-style gauge can tear fibers when marking across the grain.
You also must take note of the point when setting the gauge. For example, let’s say I want to set this style of gauge to the thickness of a board. I can’t just pinch the board between the nail and the fence because it’s not the side of the nail that does the cutting — it’s the point. I must put the tip of the nail on the edge of the board to set it properly.
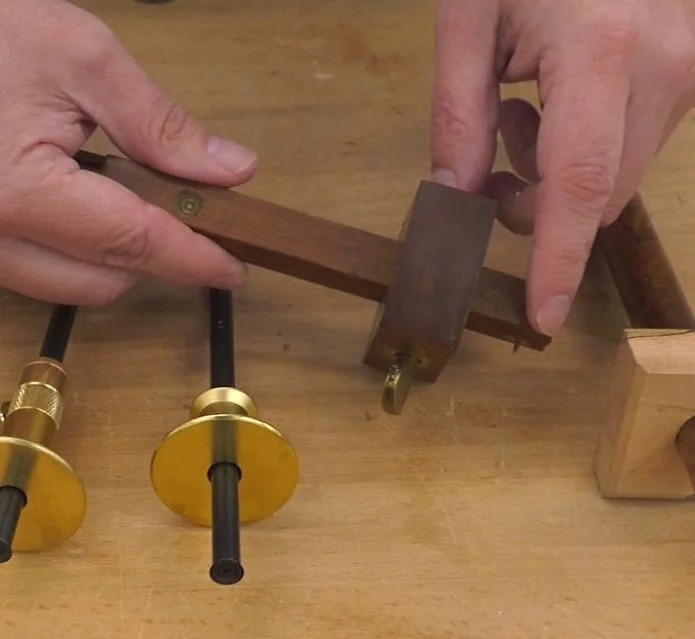
Knife-Style Gauges
This gauge features a knife-style cutter. In fact, it’s often called a cutting gauge, and it provides some benefits over the pin-style gauge.
For example, the cutter can be made razor-sharp, which will sever the fibers cleanly — especially across the grain.
With the bevel turned toward the fence, the knife shape produces a groove that perfectly fits the edge of a chisel for accurate, crisp joinery.
With the flat side facing the fence, you can pinch a board between the two, making setup faster and very accurate.

A knife will also produce a finer line than a pin-type cutter. And the knife may be removed for sharpening, while a fixed pin must be filed sharp and will wear over time.
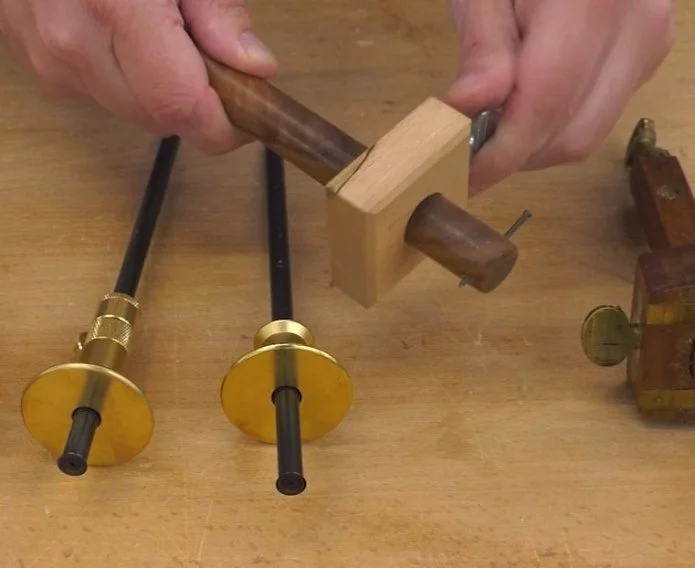
Disc-Style Gauges
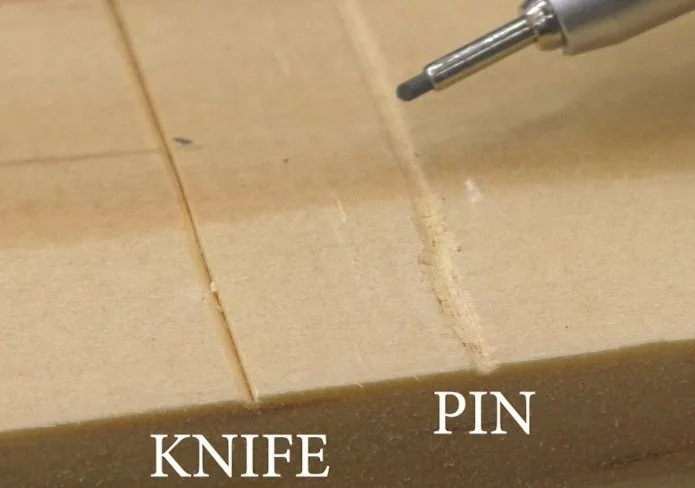
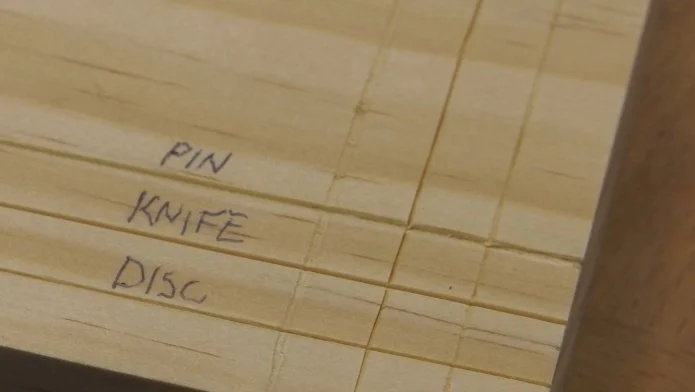
Traditionally, a pin-style gauge is considered best for marking with the grain, and a knife-style for marking across the grain. But there is a third type of cutter that I think is superior to them both:
This is my favorite type for several reasons:
These discs can be kept razor sharp and are easily replaceable if damaged.
They cut cleanly both along and across the grain.
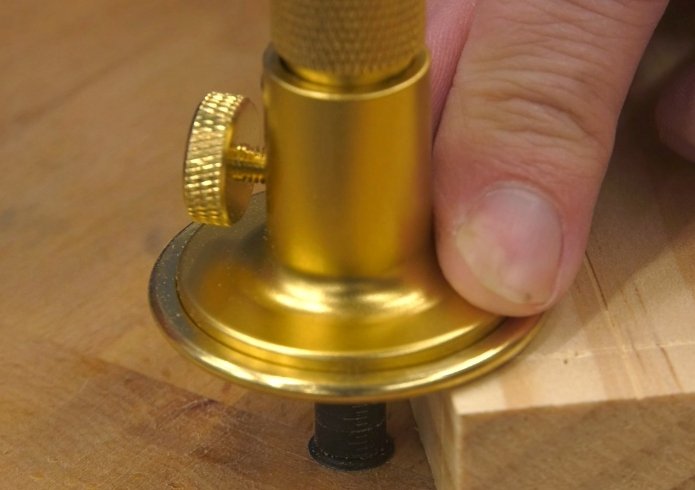
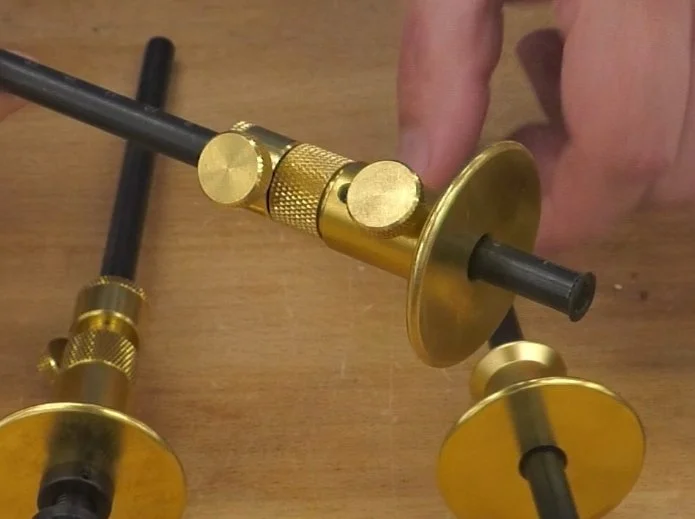
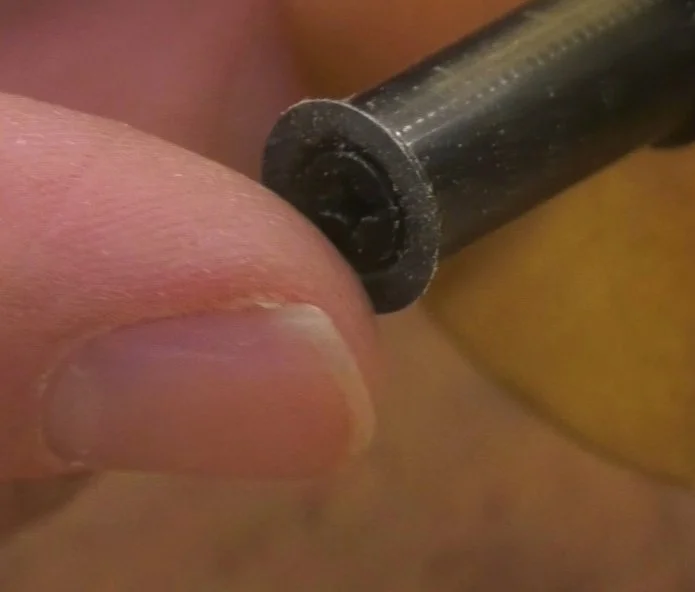
The cutter is on the end of the beam, and on well-made versions, the screw is countersunk below the surface. You may set it by placing the fence on top of a board and lowering the cutter to the benchtop — fast and very accurate.
As we get deeper into marking gauge technique in a couple minutes, you’ll see more features that make this type of gauge the best choice, in my opinion. I’ll link to this gauge below because I know a lot of you will be asking where I got it.
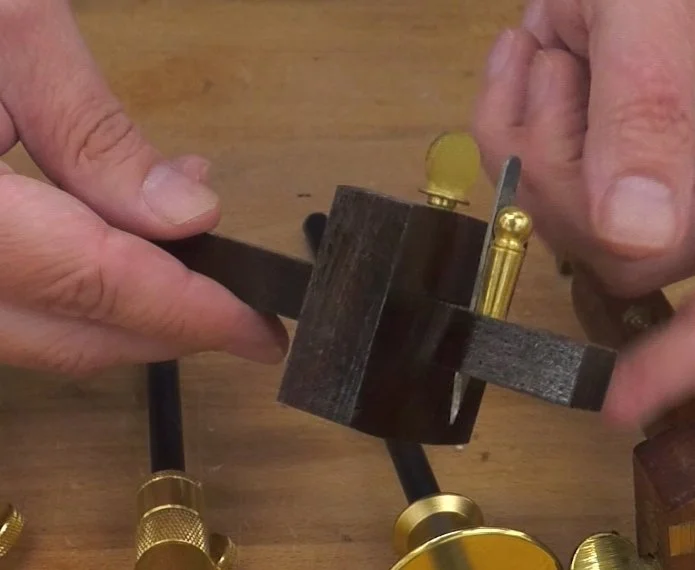
Cutter Configurations
So far, we’ve discussed cutter types, but there are other important differences.
Some gauges have simple beams with single cutters. Others feature multiple cutters. Gauges with dual cutters are designed for marking two lines at the same time — perfect for laying out a mortise or a tenon. We’ll get to that in a bit.
How to Use a Marking Gauge
To begin, decide how you will support your workpiece. If I’m marking down the edge of a board, I might place one end on the bench and push the gauge away from me.
Note how the cutter is on the trailing side of the gauge. Both the fence and the beam are in contact with the wood at the start of the cut, and the cutter drags behind. Don’t try to stand the cutter on end — that will snag the wood fibers. Place the fence against the edge, the beam on the surface, and rotate the cutter until it makes contact.
There’s no reason to mark your line in a single pass. In fact, being too aggressive can cause the cutter to follow the wood grain, forcing the fence away from the edge and creating a wavy line. So take light passes — just scratching the surface — and build up your line gradually. And remember: keep pressure against the edge of the board so the fence remains there.
If you’re working with coarse-grained wood (like oak or ash), the cutter may wander. One trick: Start with the final inch of the line, then step back an inch at a time. Establishing a straight track through small steps helps control the cut.
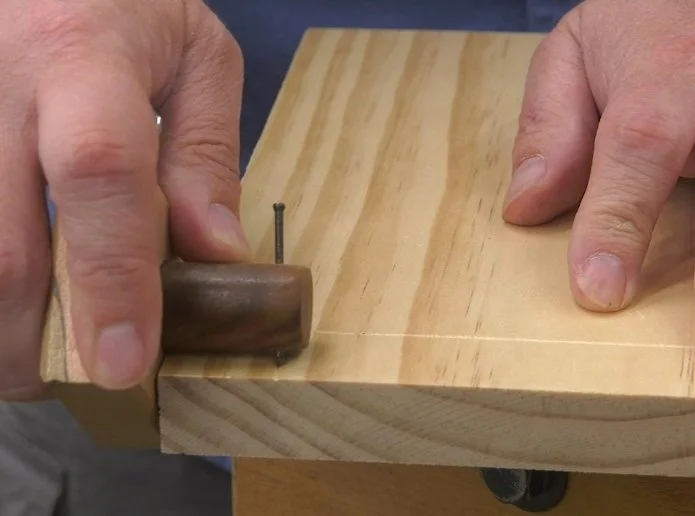
You can also reverse the direction — pulling the gauge toward you — or lay the board flat on the bench, which I find especially convenient when marking the end of a workpiece.
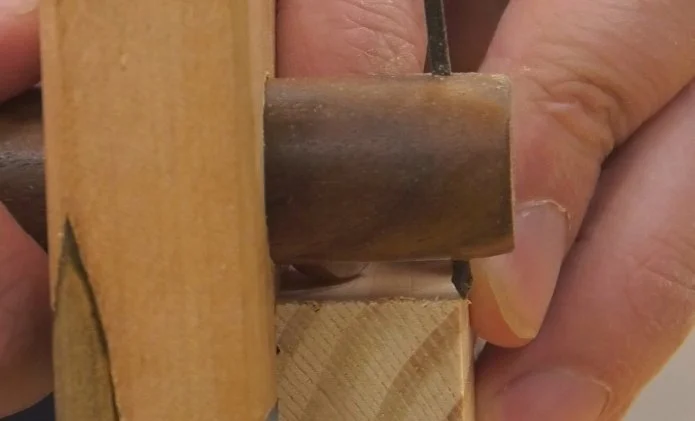
Holding the Gauge
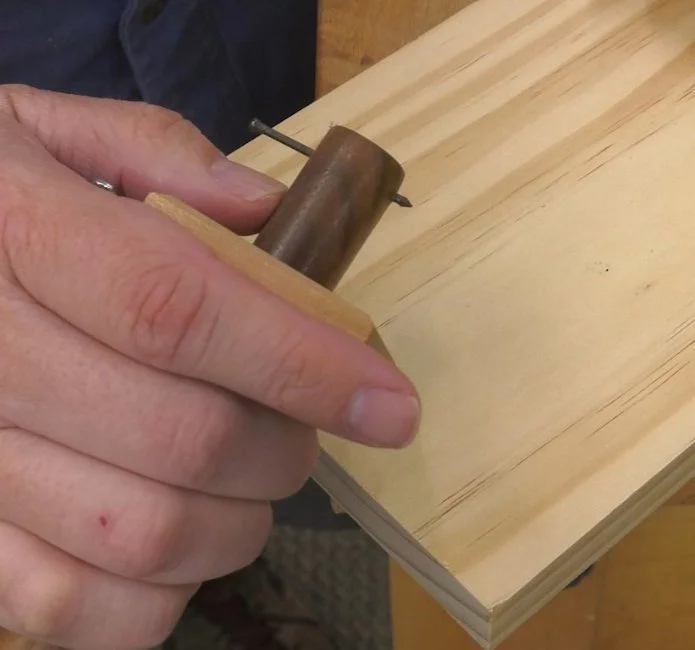
Note how I’m holding the gauge. With this traditional style, I have my thumb on the beam and I’m holding the fence primarily with my index and middle fingers. The ring and pinky fingers aren’t doing much. This grip helps me balance bulkier gauges and keep the fence flat against the board.

But I prefer a different grip with modern disc-style gauges — I hold just the fence. This is possible because the disc's bevel faces the fence, creating a wedging effect that pulls the fence toward the board as it cuts.

Another reason I prefer disc-style cutters is that they can be rolled around corners for cleaner transitions — no torn fibers. I also don’t have to tilt the cutter into the wood at the beginning of the stroke, as I do with pin or knife cutters.
And the micro-adjust feature on this gauge? It’s a game-changer, especially when you do need to set it to a ruler mark. I’ll link to this gauge below.
Applications You Might Not Have Considered
Now that you know how to use a marking gauge, here are some more ways to put it to work:
Mark a line parallel to an edge or end, for rabbets, dovetails, and slip joints.
Mark a line parallel to a surface, useful for thickness planing (by hand or machine).
Lay out tenon cheeks by setting dual pins to the width of your mortising chisel, hollow chisel, or router bit.
Find the center of a board: mark from both sides and split the difference. A micro-adjuster helps here, too.
Mark the centers of turning blanks — once set up, you can quickly mark blank after blank.
The Biggest Advantage
The biggest benefit of a marking gauge? Repeatability.
If you have to mark a bunch of workpieces with a ruler, error creeps in. A marking gauge eliminates that.
I like to have at least two on hand so I can repeat more than one setup during a project. They’re pretty inexpensive, so it’s a good idea to have multiple on hand. Happy woodworking!
(This article contains affiliate links. If you make a purchase, I may receive a small commission.)
Inexpensive disc style marking gauge: https://www.chipsfly.com/wheel-marking-gauge.html
Micro-adjustable disc style marking gauge: https://www.chipsfly.com/micro-adjust-wheel-marking-gauge.html
Disc style mortising/marking gauge: https://lddy.no/10muz
Need some cool tools for your shop? Browse my Amazon Shop for inspiration.