LOOSE-TENON JOINERY WITHOUT A FESTOOL DOMINO
Loose tenons simplify traditional mortise and tenon joinery, allowing faster, more repeatable joints without sacrificing strength. This article walks you through creating a custom mortise jig, cutting precise mortises with a router, and sizing loose tenons for a flawless fit.
Mortise and tenon joinery is fundamental to good, sturdy woodworking. In the "old-timey" days, the mortise would be chopped by hand, and the tenon would be cut one cheek at a time with a hand saw.
Modern routers have made it much faster to cut mortises. While machines like the table saw have taken a lot of the elbow grease out of cutting the tenon half of the joint, they still must be cut one cheek at a time, and that leaves room for error to creep in.
But if the mortise is the easier half of the joint, why not cut two mortises and connect them with a loose tenon? Loose tenons are much faster to make. You merely rip a board to the right width at the table saw, round the edges at the router table, and cut it up into short pieces. You can create dozens of tenons in just a few minutes.
Now that we've simplified tenons, let's turn our attention back to those mortises. If you have several to make in a single project, it pays to spend a couple of minutes and a few scraps to create a custom jig.
Building a Custom Mortise Jig
Your center strips MUST be the same width as the bushing installed on your router
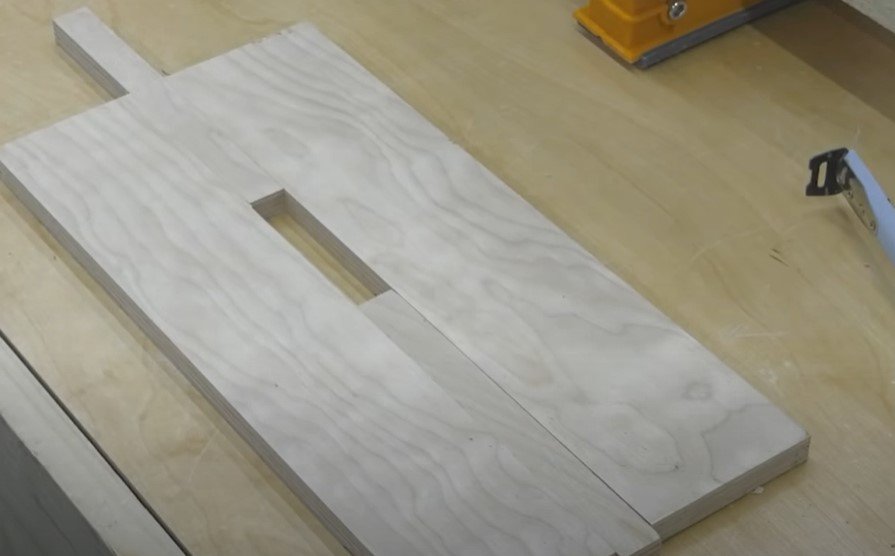
First, cut some scraps of plywood. The larger pieces should be about 6 or 8 inches by 3 or 4 inches. Their exact size isn't important, but the thin strips in the center are crucial. They must be the same width as the bushing installed on your router. It doesn't matter what size the bushing is, just ensure the center strips in your jig are the same width.
Next, determine the rough length you want your mortise to be. This doesn't need to be exact, just make sure it's shorter than the end of the narrowest workpiece you'll be using the jig on. Keep in mind that, as you glue your jig together, the actual mortise you will cut will be slightly shorter than the space you just created due to the offset created by the bushing surrounding your router bit.
Fight the urge to calculate exactly how much offset there is. It doesn't matter because the exact length of the mortise isn't critical.
Now, we need to attach a fence to our jig. Place the plate you just assembled on top of one of your workpieces and center the hole by eye. Use a pencil to mark a line on the underside of the jig plate along the edge of your workpiece. This line indicates where your fence will be mounted.
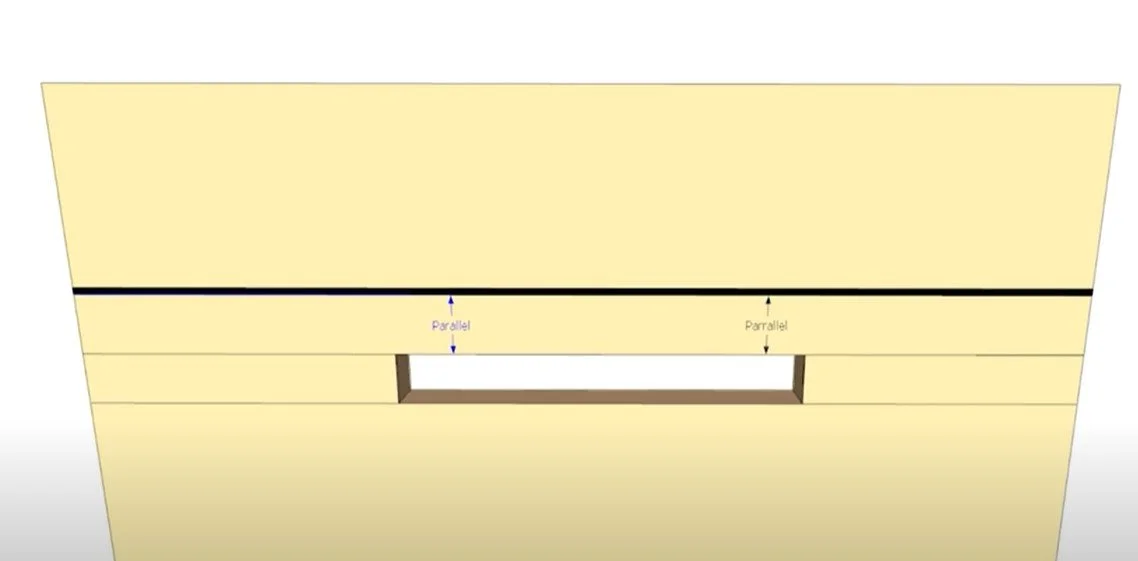
The line for your fence needs to be parallel to the mortise.
It's essential that this line be parallel to the mortise. If it's off, your mortises will be crooked, leading to assembly issues. The easiest way to ensure that line is parallel is to replace it with a kerf cut at the table saw.
This method works because we know the edge of the plate is parallel to the edge of the mortise, and the table saw fence will ensure the kerf is as well.
The distance of the kerf from the mortise isn't important. We eyeballed it when we drew the pencil line, so don't stress over that when you cut the kerf. All that matters is that the kerf is parallel to the mortise.
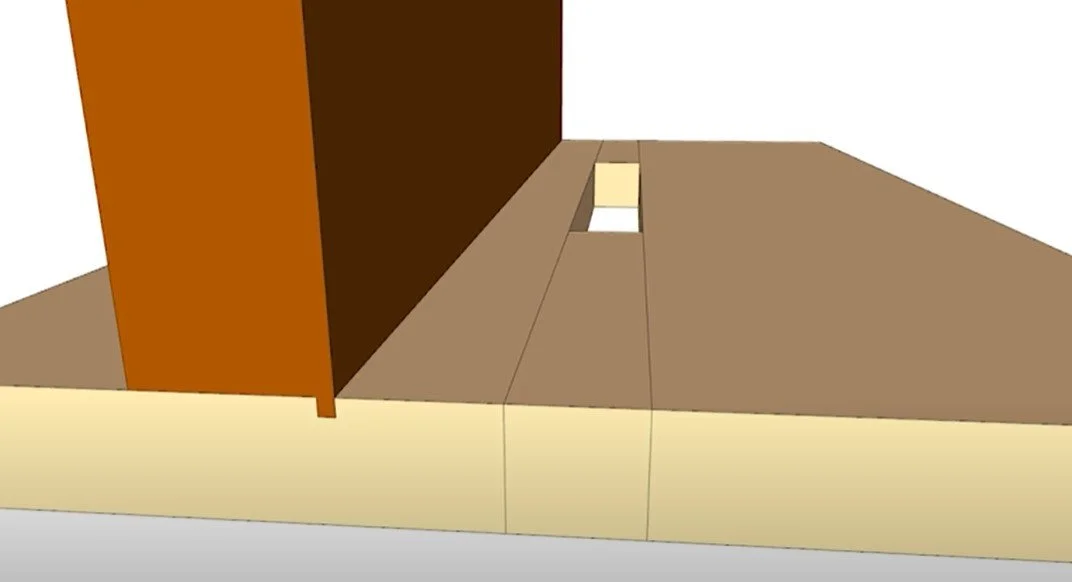
Next, grab another scrap of wood. Raise your table saw blade and skim the edge, leaving a tongue that will fit into the kerf. It will only take a couple of passes, slowly raising the blade until the tongue fits perfectly.
What you've created is a fence that will self-align with the mortise as you attach it to the jig, securing it with screws.
Cutting Mortises
That's it for the jig. Now, let’s cut some mortises.
Draw lines across the center of each joint.
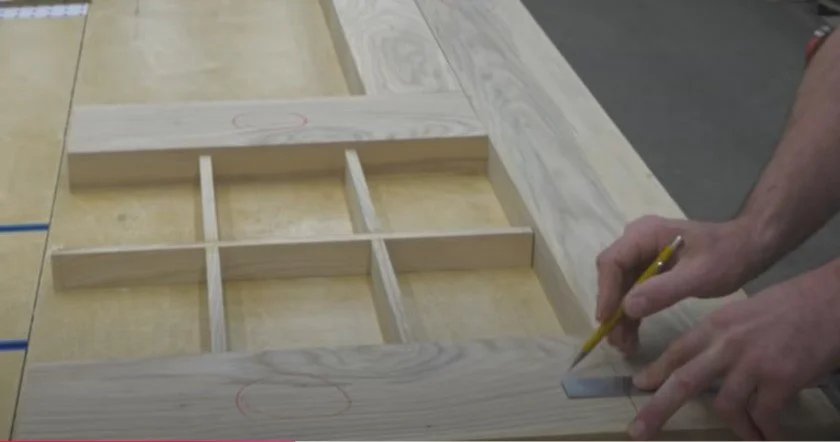
Lay your workpieces together as they will be assembled, with the show faces up. Here, we’re making a door, which is a perfect project for this type of joinery. Draw lines across the center of each joint. These lines will help you position the jig. Use a square to extend them around the edge or end where the mortise will be cut.
Note that we've also drawn a line at the center of the jig's mortise opening. This line can be aligned with the center line on your workpiece, and the jig can be clamped in place.
Align your center lines.
It's important that the jig's fence is always placed on the outer face of the workpiece. That's why it didn't matter if the mortise hole was perfectly centered on the edge of the workpiece when we laid out the position of the fence. As long as you always place that fence on the outer, show face of each workpiece, everything will line up perfectly. You’ll have no problem keeping track of the outer faces of your workpieces because that's where you drew the center lines earlier. The jig's fence will always cover those lines.
I recommend using an upcut spiral router bit. Upcut bits help pull chips out of the mortise and keep the bit cooler, extending its life. However, you will still need to take several shallow passes, going about 1/4-inch deeper with each one. If you're cutting a large mortise, you might still have issues clearing the chips unless you pause and vacuum them out from time to time.
Remember, clearing the chips is essential to keeping your bit cool and sharp.
If you're experiencing a lot of vibration while making each pass, try changing your technique. Instead of moving the router sideways through each cut, plunge the bit repeatedly downward to full depth, boring a series of holes along the length of the mortise. This is my favorite method, especially for cutting deep mortises. Once most of the waste is gone, you can clean things up with a final pass across the mortise’s length at full depth.
Final Adjustments and Assembly
Once you’ve cut your first mortise, you’ll know how wide to cut your loose tenon stock without having to calculate the bushing offset. Remember, tenon stock is cut into long pieces, which are then crosscut into many loose tenons.
It’s a good idea to cut your tenon stock slightly narrower than the length of the mortise. This gives you room to adjust the position of the assembled workpieces in case the jig wasn’t perfectly centered on the center line, or if you want to make an adjustment during assembly. The strength of the joint comes from the glue surfaces on the faces of the loose tenon. It will not be weakened if the tenon is slightly narrower than the mortise's length.
And that’s all there is to it. Loose tenon joinery is easy to make, super strong, and now you know how to do it too. Try it out in your next project!
Need some cool tools for your shop? Browse my Amazon Shop for inspiration.
(This link is an affiliate link. If you make a purchase, I may receive a small commission.)


