
THE CLEVER 10-SECOND WOODWORKING TRICK I USE TO IMPRESS PEOPLE
In this post, I'll share with you a clever method to make two pieces of wood fit together in such a satisfying way that you'll start looking all over for scraps to use. Honestly, this technique will make you feel like a woodworking master.
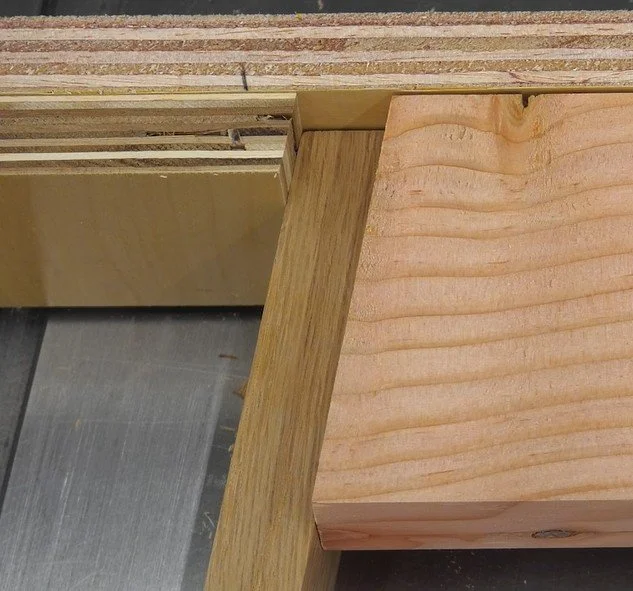
One of the projects we've been working on behind the scenes is a large dining table with a post-and-beam base made from 4x4s. This type of structure can be challenging because all the joints need to be perfectly flush. You can't just cross two pieces of wood and nail them together; that wouldn't be strong and would look like garbage.
To achieve the necessary strength and appearance, we're using lap joints. These joints are relatively simple: you remove half the thickness of two pieces of wood and fit them together. The tricky part is getting the fit just right without too much fuss, especially when the joint is in the middle of a workpiece rather than at the end.
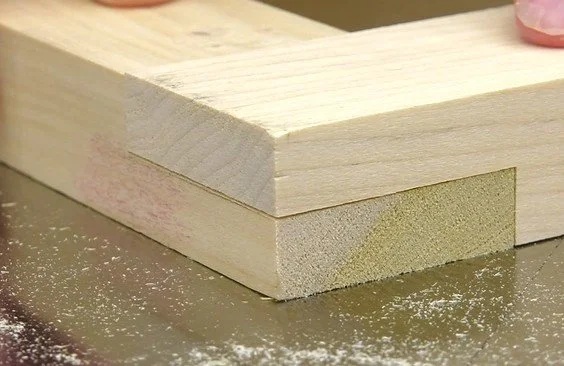
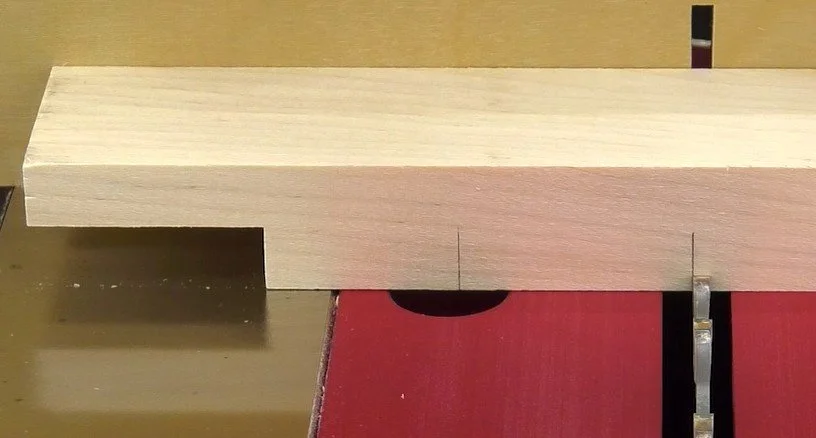
A perfect end lap
But the way I do it is so simple, and it works perfectly every time. First, I'll go over how to make end-laps. Then, I'll walk you through making a cross-lap, and finally, how to do angled lap joints, just like we did for our table.
Tools You'll Need
I used a table saw, but the same process can be done with a router table and a straight bit. If you're using a table saw, a dado set can make the job easier, but it’s not necessary. You can use a regular saw blade as long as it cuts a reasonably flat-bottom kerf. A flat-grind rip blade is your best bet.
The Key to Perfect Lap Joints
The key to this whole process is a little scrap of hardwood. It must be exactly as thick as your saw blade so that it fits perfectly into the kerf it cuts. Take some time to get this right, then you can save and reuse it every time you make lap joints in the future.
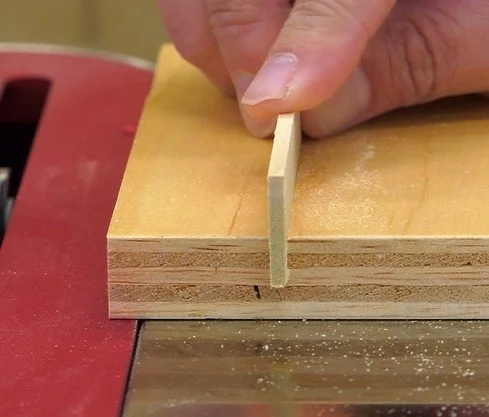
A shim that fits perfectly in the kerf.
It doesn't matter if you're using a regular blade like I did, a dado set of any thickness, or a router bit of any diameter—1/4", 3/4", 8mm, whatever. Just make sure the shim matches the tool you're using.
Setting Up the Saw
A wooden sacrificial fence I attached to my miter gauge.
I attached a wooden sacrificial fence to my miter gauge. I prefer it to extend several inches past the blade, and I will explain why in a minute.
Below are the two pieces I used to connect with an end lap. I marked the mating faces to keep everything aligned. I also had another scrap of the same material that I used to set my blade height.
The two pieces I used for to make an end lap, as well as a scrap piece for setting my blade height.
Setting Blade Height

This is the first clever tip in the process. I don’t measure the wood thickness. Instead, I raise the blade by eye, just below the center point of the workpiece. Then, I’ll make a cut, flip the workpiece over, and cut again. I'll repeat those cuts a few times, slowly raising the blade higher until the final pass just skims off the remaining fibers. Now I know the blade height is set to exactly half the thickness of my workpiece.
Setting the Stop Block
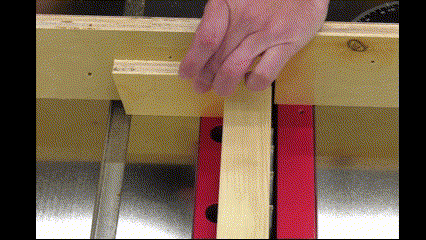
Next, I’ll take one of my workpieces (or a scrap of the same width) and place its edge against the blade’s teeth, with its end against the miter fence. That's why I made the fence a little extra long—it gives me room to clamp a stop block right up against the workpiece.
Now here's the clever part. I want to cut away a section from the end of my mating workpiece so that the two can fit together. But if I put the end of that piece right against the stop block, my first cut will be too far to the right. That's because the thickness of the blade must be deducted from the stop block's position.
This is where the shim comes in. I'll place it between the end of my workpiece and the stop block, shifting the workpiece back so that the first cut falls in the precise location it needs to be.
The Simple Setup
That’s it for the setup. Just use one workpiece to set the stop block, then use the shim to offset for the blade. Now you're ready to cut. It really couldn’t be simpler, and it's virtually impossible to screw up.
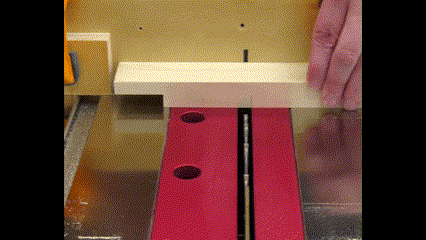
The wider your blade or router bit is, the fewer passes it will take to remove the waste. But after you repeat the process on both workpieces, you’ll have a perfectly fitting end lap joint, flush on all the edges and surfaces, every time.
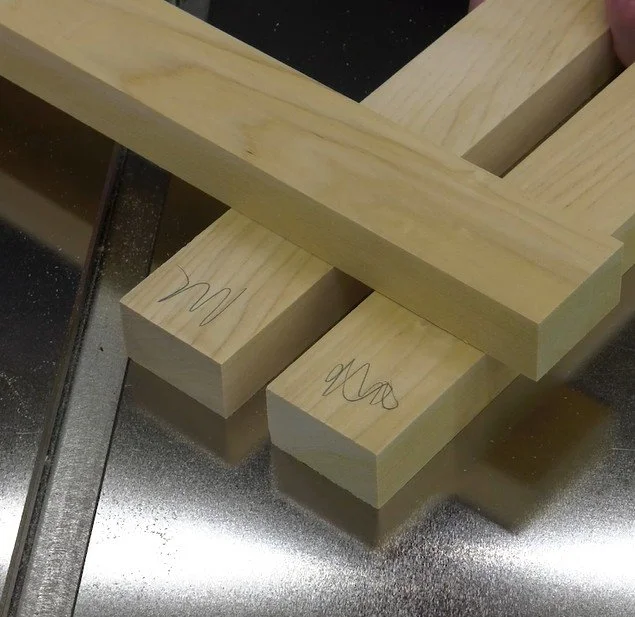
Cross-Laps: A Little More Challenging, but Still Simple
Now, let’s talk about cross-laps. These may seem more challenging because the fit has to be more precise, but it's just as easy.
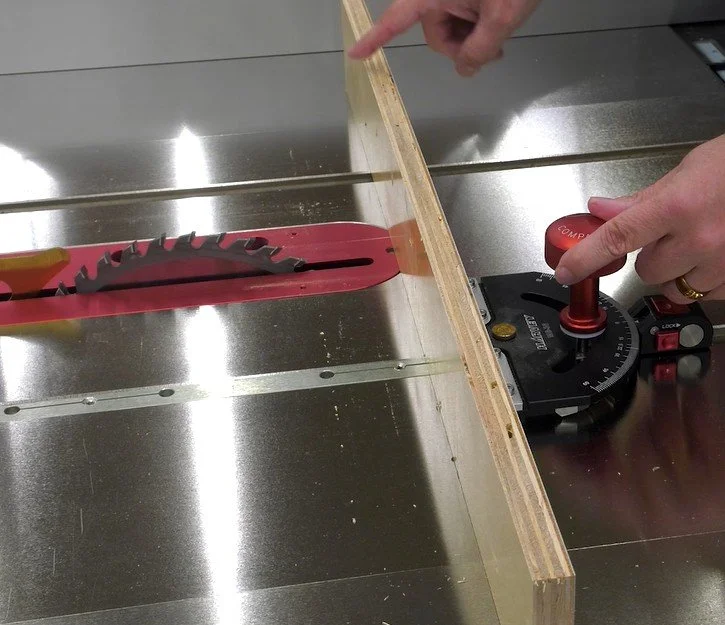
I marked on my workpiece where I wanted the cutout to be. I aligned the blade to the left of that line, technically outside the cutting area. That’s where I set my stop block. If your miter gauge fence isn’t long enough because your lap joint is in the middle of a larger workpiece, you can use your table saw’s rip fence as the stop block.
Line up for cutting a cross lap.
Now I’ll use the shim, just as before, to compensate for the blade thickness and make my first cut. Next, I’ll replace the shim with the mating workpiece or a scrap of the same width, and make a second cut at that offset. Finally, I’ll remove the waste in between. By using the mating workpiece as a second shim, the width of the cutout will be perfect, and the fit will be so satisfying that you'll want to show it off to everyone.
Angled Joints: Still Easy
OK, let’s complicate things just a little and cut one at an angle. Actually, it’s not complicated at all. In this case, the angle was 10 degrees, so the end of the workpiece is cut at that angle, and the miter gauge is set to match. The edge of the stop block is also beveled to that angle, as is the edge of my shim.
The miter gauge, workpiece, stop block end, and edge of shim are all set to a 10 degree angle.
Keeping these angles consistent will cause all your stops and shims to fit together perfectly. The process is exactly the same. We used a dado stack to remove the waste faster this time. The dado thickness doesn't matter as long as the shim matches. The same goes for a router bit.
Conclusion
We still have a lot more work to do on the table, but all those lap joints—no matter how complicated they may have seemed at first—are not as intimidating as they once appeared, even the angled ones. With this simple method, you’ll be making perfect lap joints every time. Happy woodworking!
Need some cool tools for your shop? Browse my Amazon Shop for inspiration.
(This link is an affiliate link. If you make a purchase, I may receive a small commission.)